Configure your profile and preferences
This tutorial guides you through configuring your Lumos account and profile. You will learn how to customize your information, add a signature, a logo, and manage your contracts and preferences.
These configurations are very important and should be completed before you start creating inspections.
Visit inspector.lumos.property
1. Start Lumos Configuration
To configure your Lumos application, simply click on the profile tab at the bottom left.
2. Access the Profile Tab
Then click on Settings.

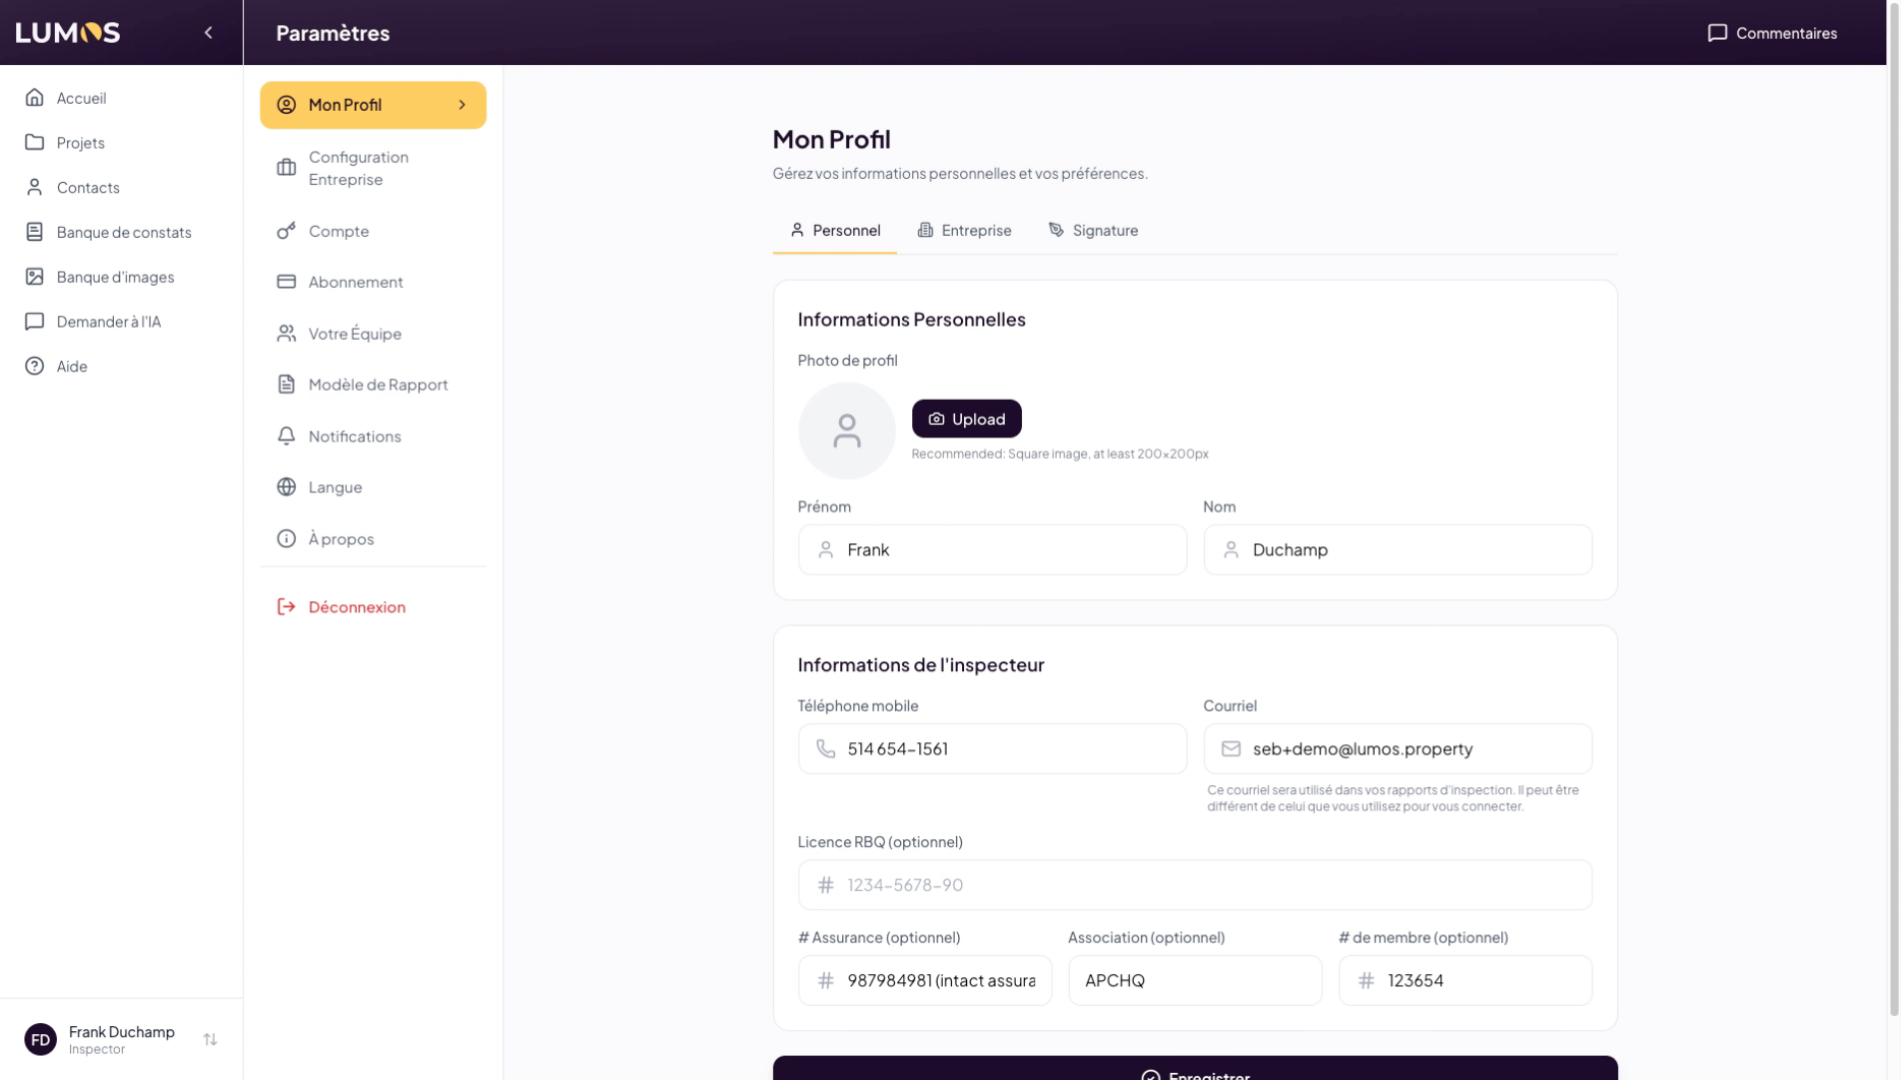
3. Configure Personal and Company Profile

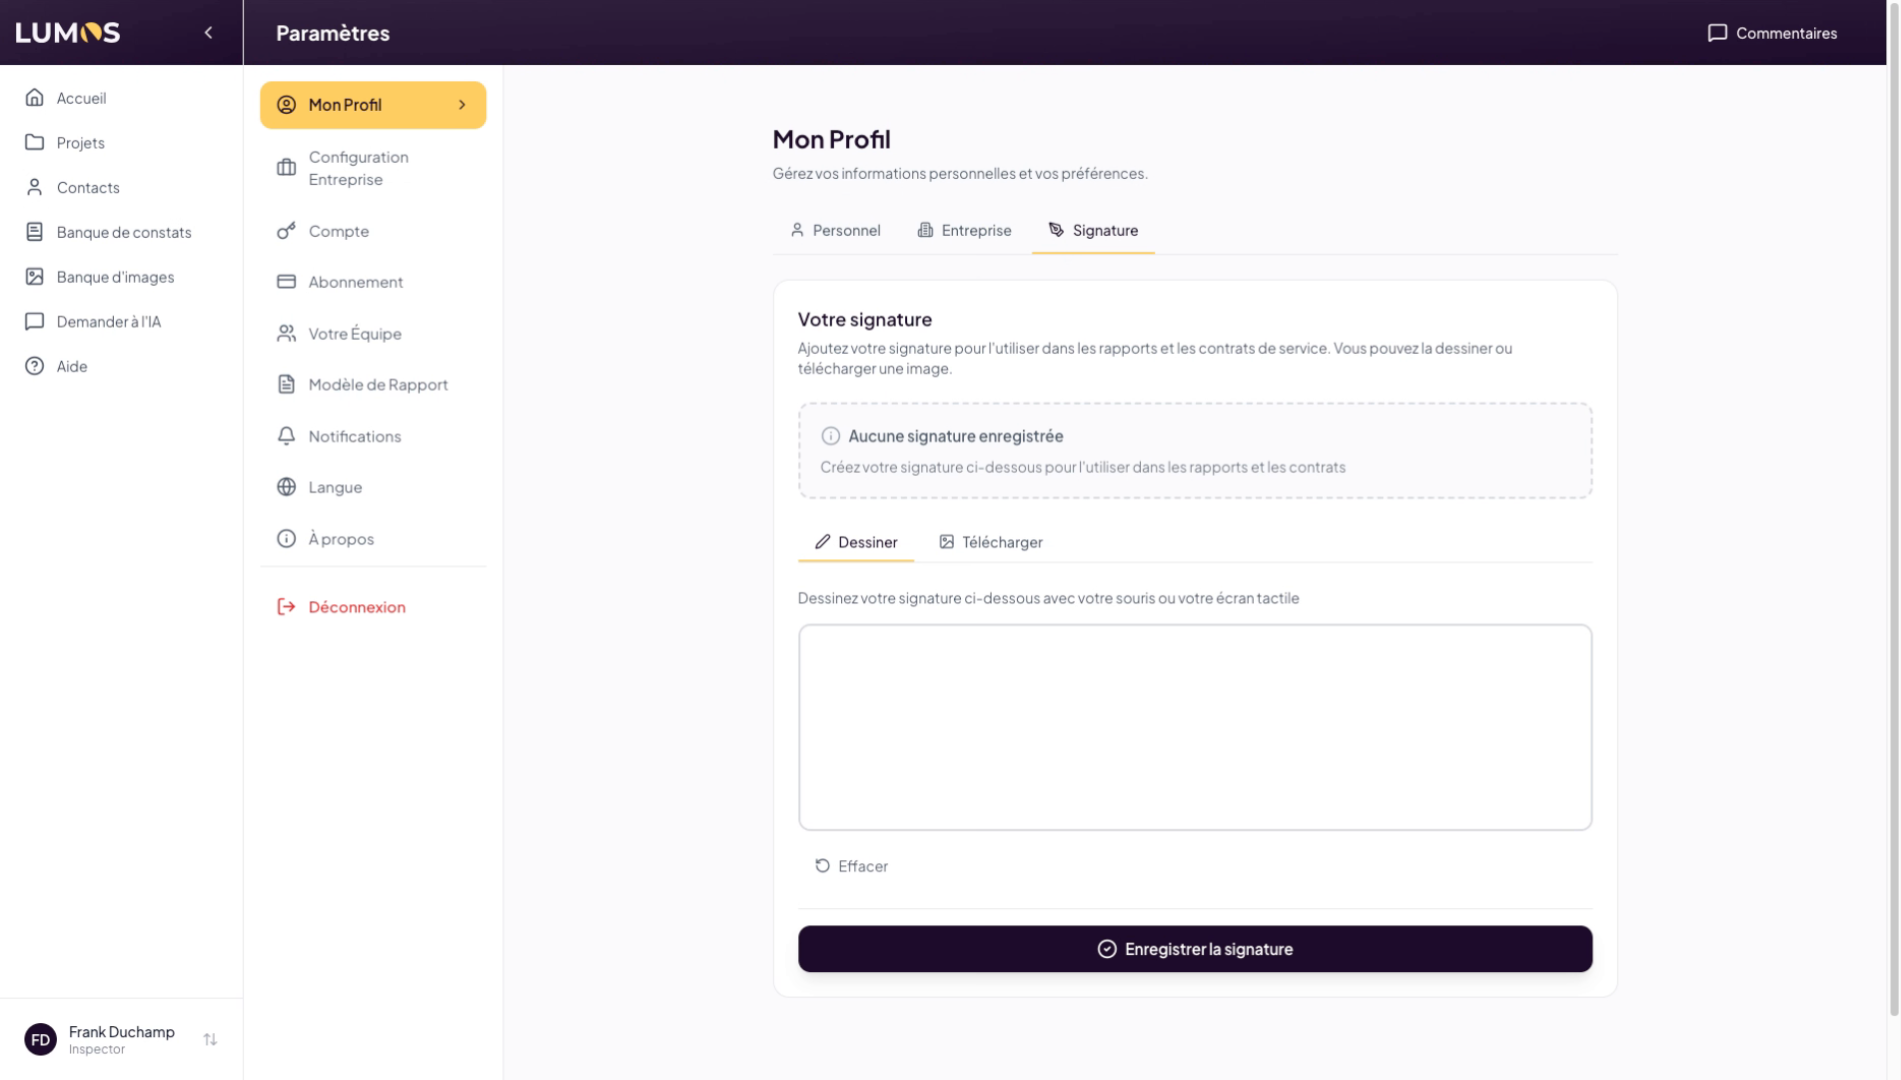
4. Add and Save a Signature
To add a signature, simply draw your signature and save it. You can also upload an image of your signature if you prefer.
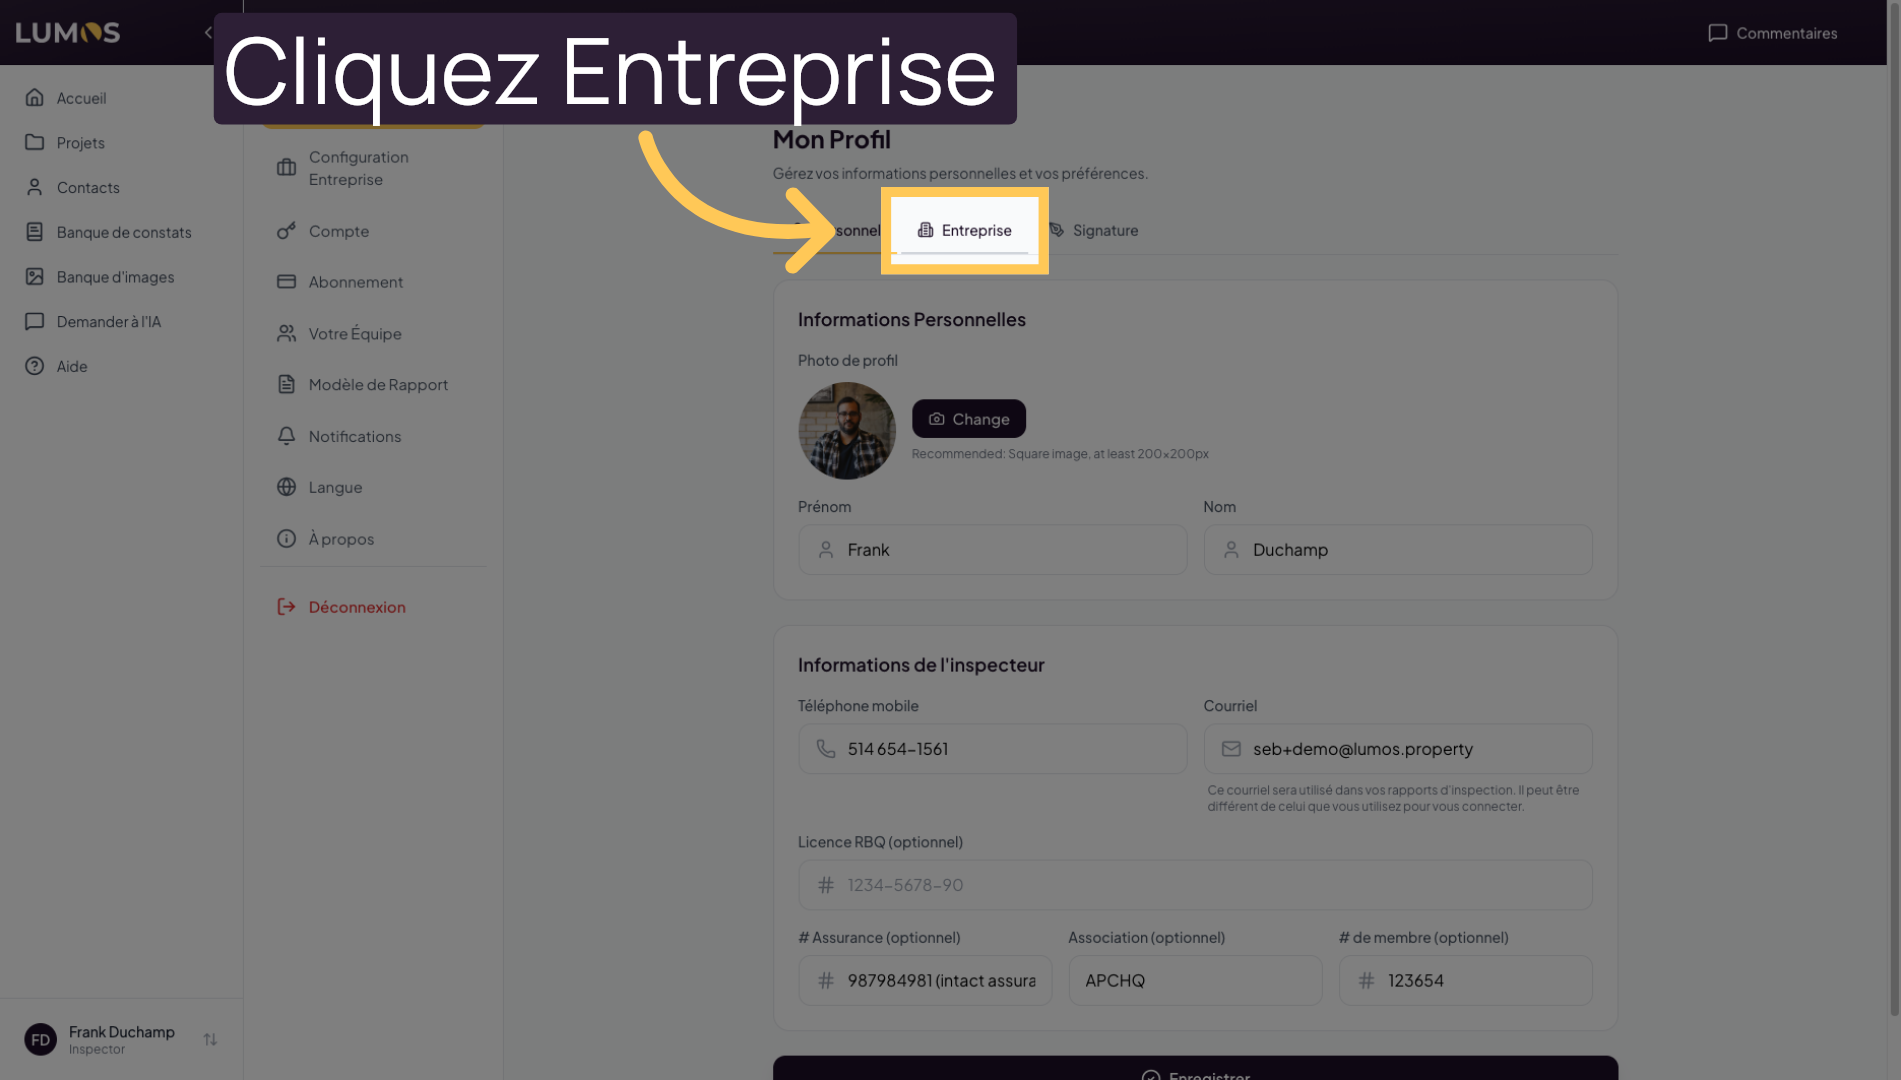
5. Select the Personal Tab
Click on the Personal tab to access your personal profile information.
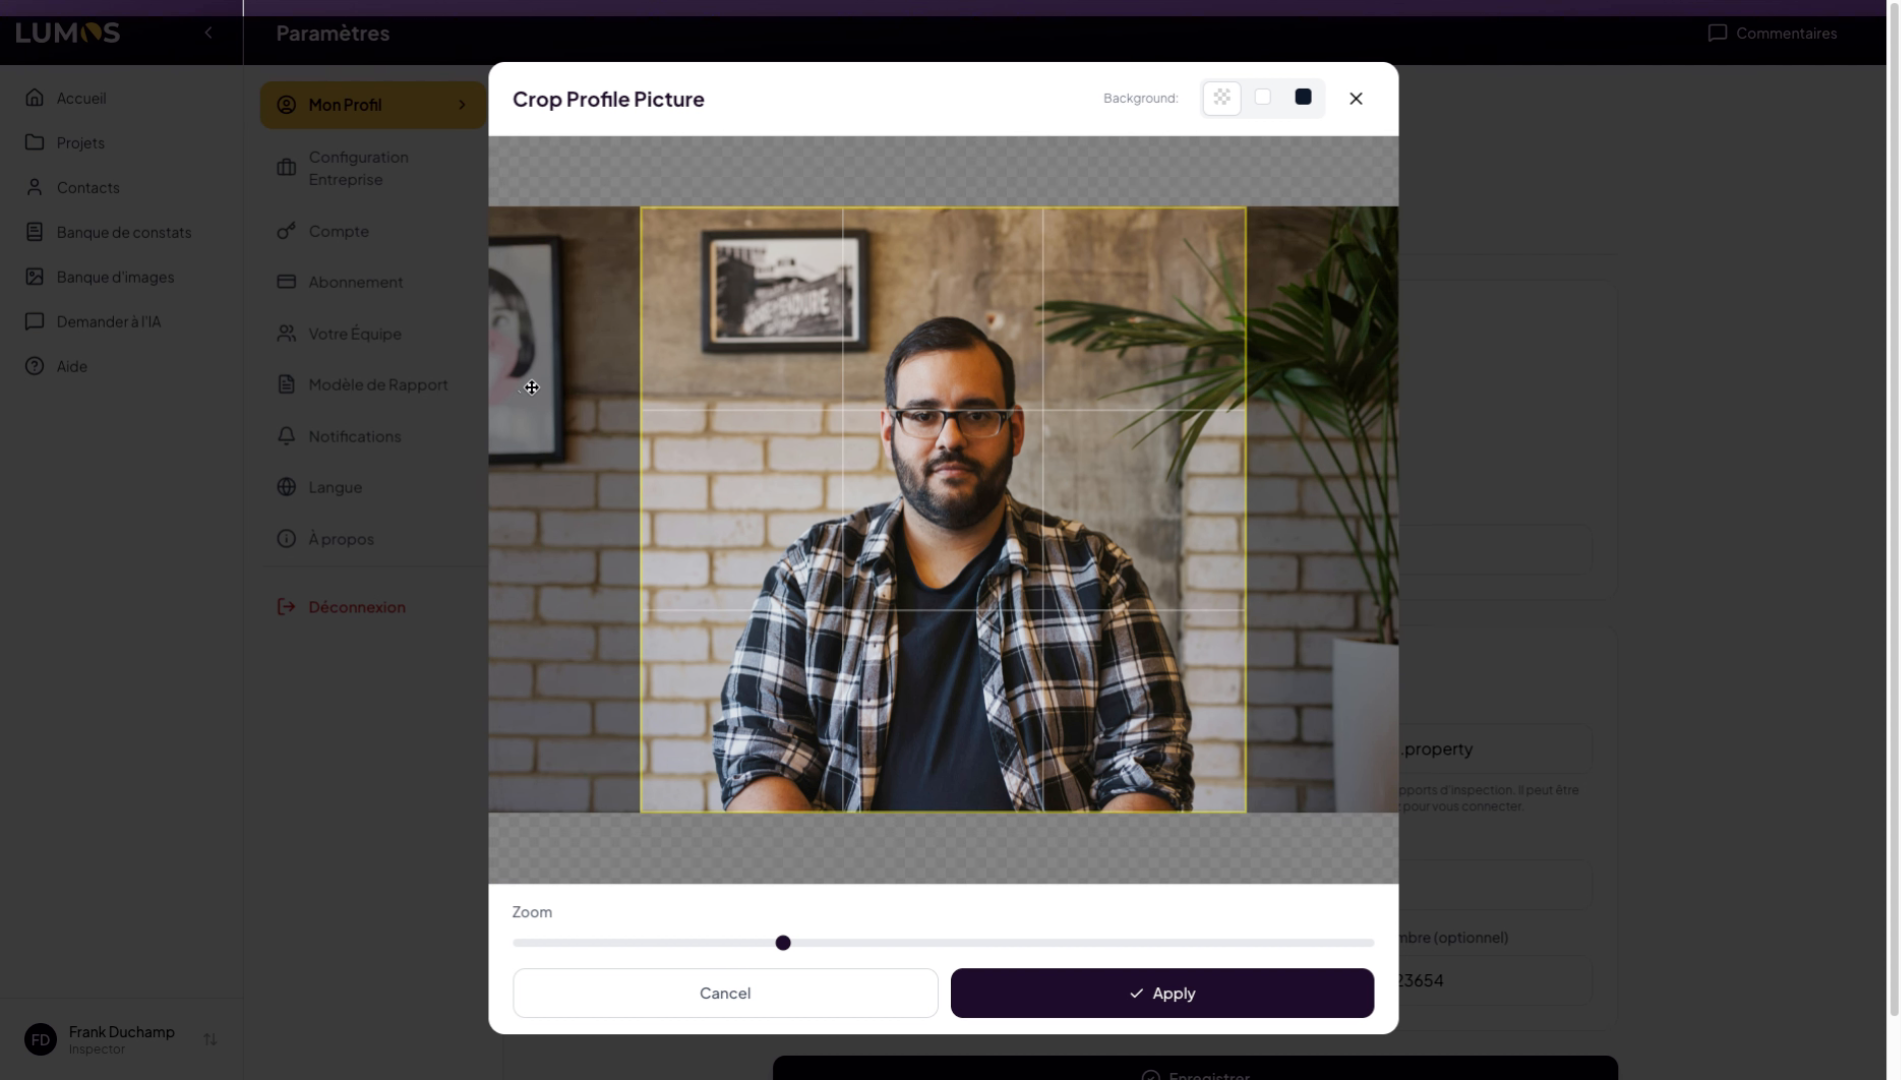
6. Add a Profile Photo

7. Select Your Profile Image from Your Computer
Select your profile photo from your hard drive to use it in the Lumos application.
8. Choose and Adjust the Profile Image
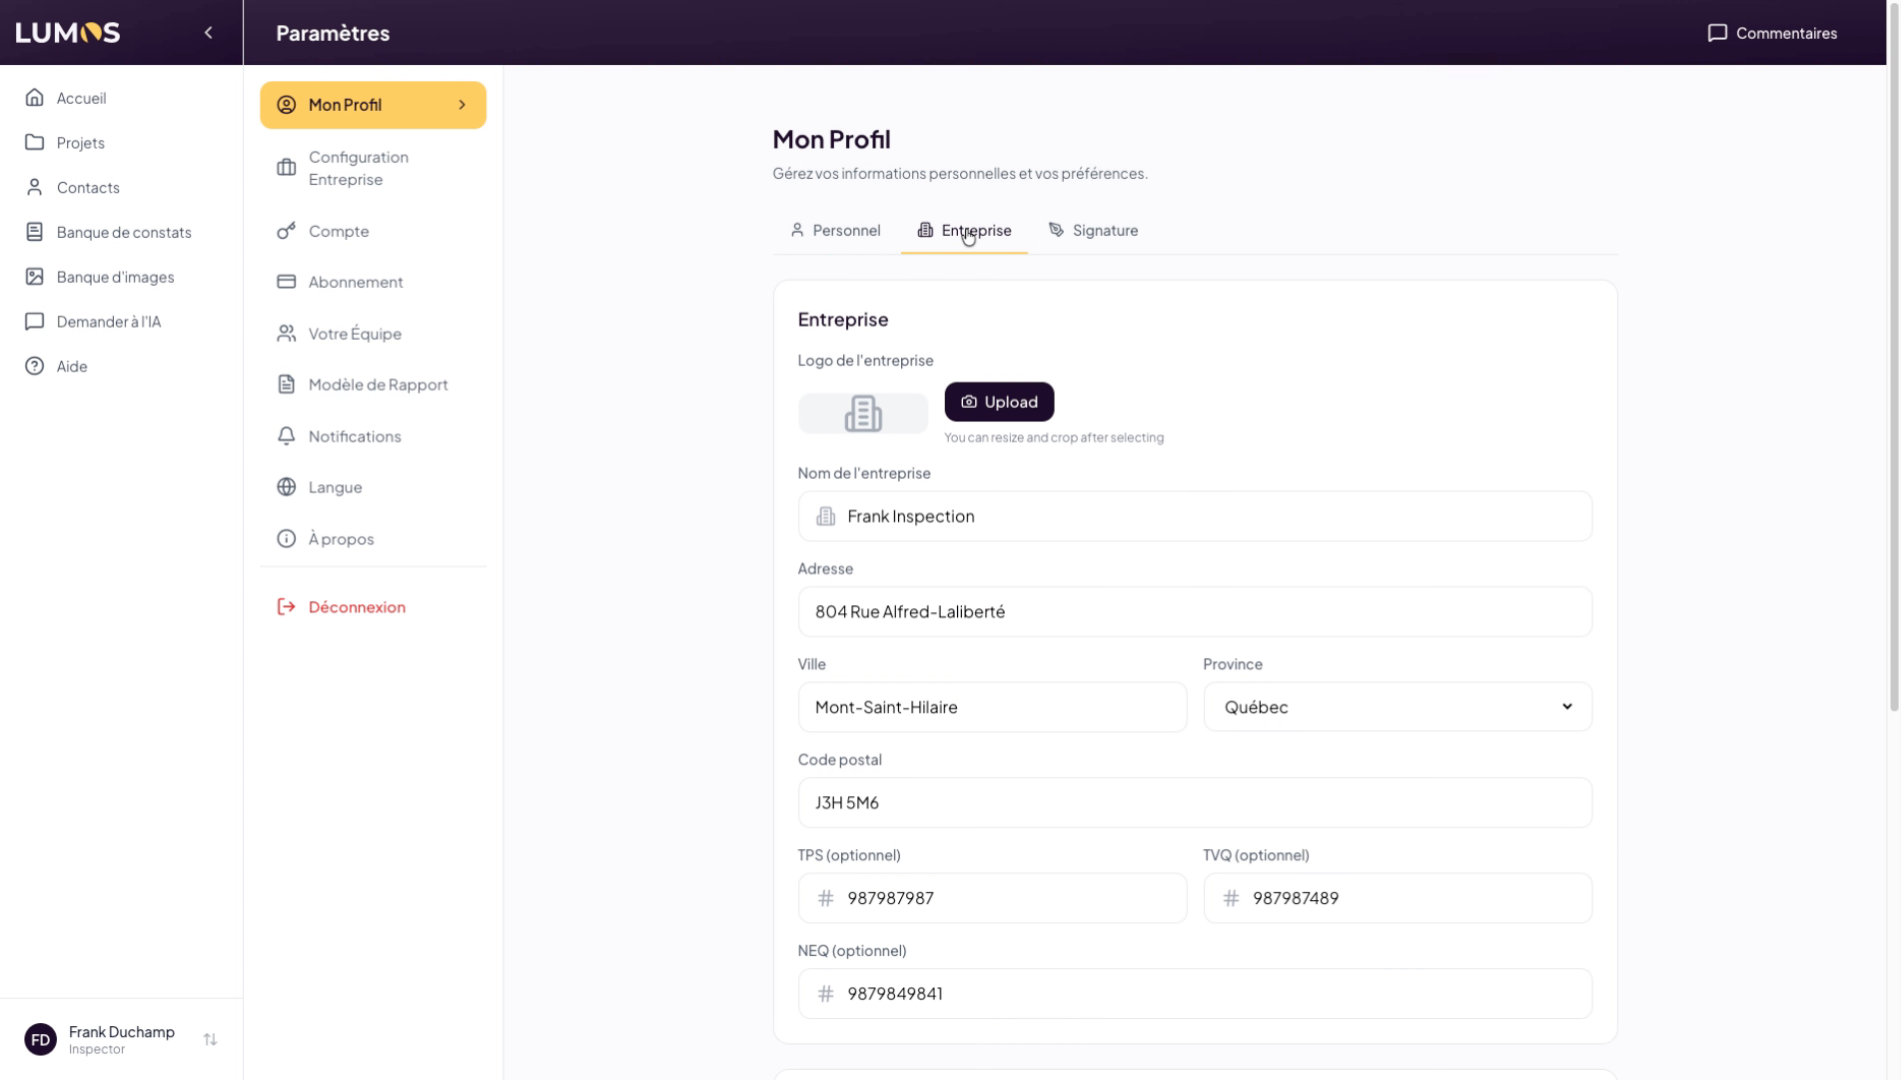
9. Select the Company Tab
Click on the Company tab to manage your company information.
10. Add and Integrate the Company Logo
You can do the same with your company logo. Ideally choose your logo with a transparent background. Add your logo, adjust as needed, and apply the changes. Your logo will then be automatically integrated into all your inspection reports, invoices, and other related documents.
11. Access Company Configuration
Click on Company Configuration to finalize your company settings.

12. Open Company Configuration
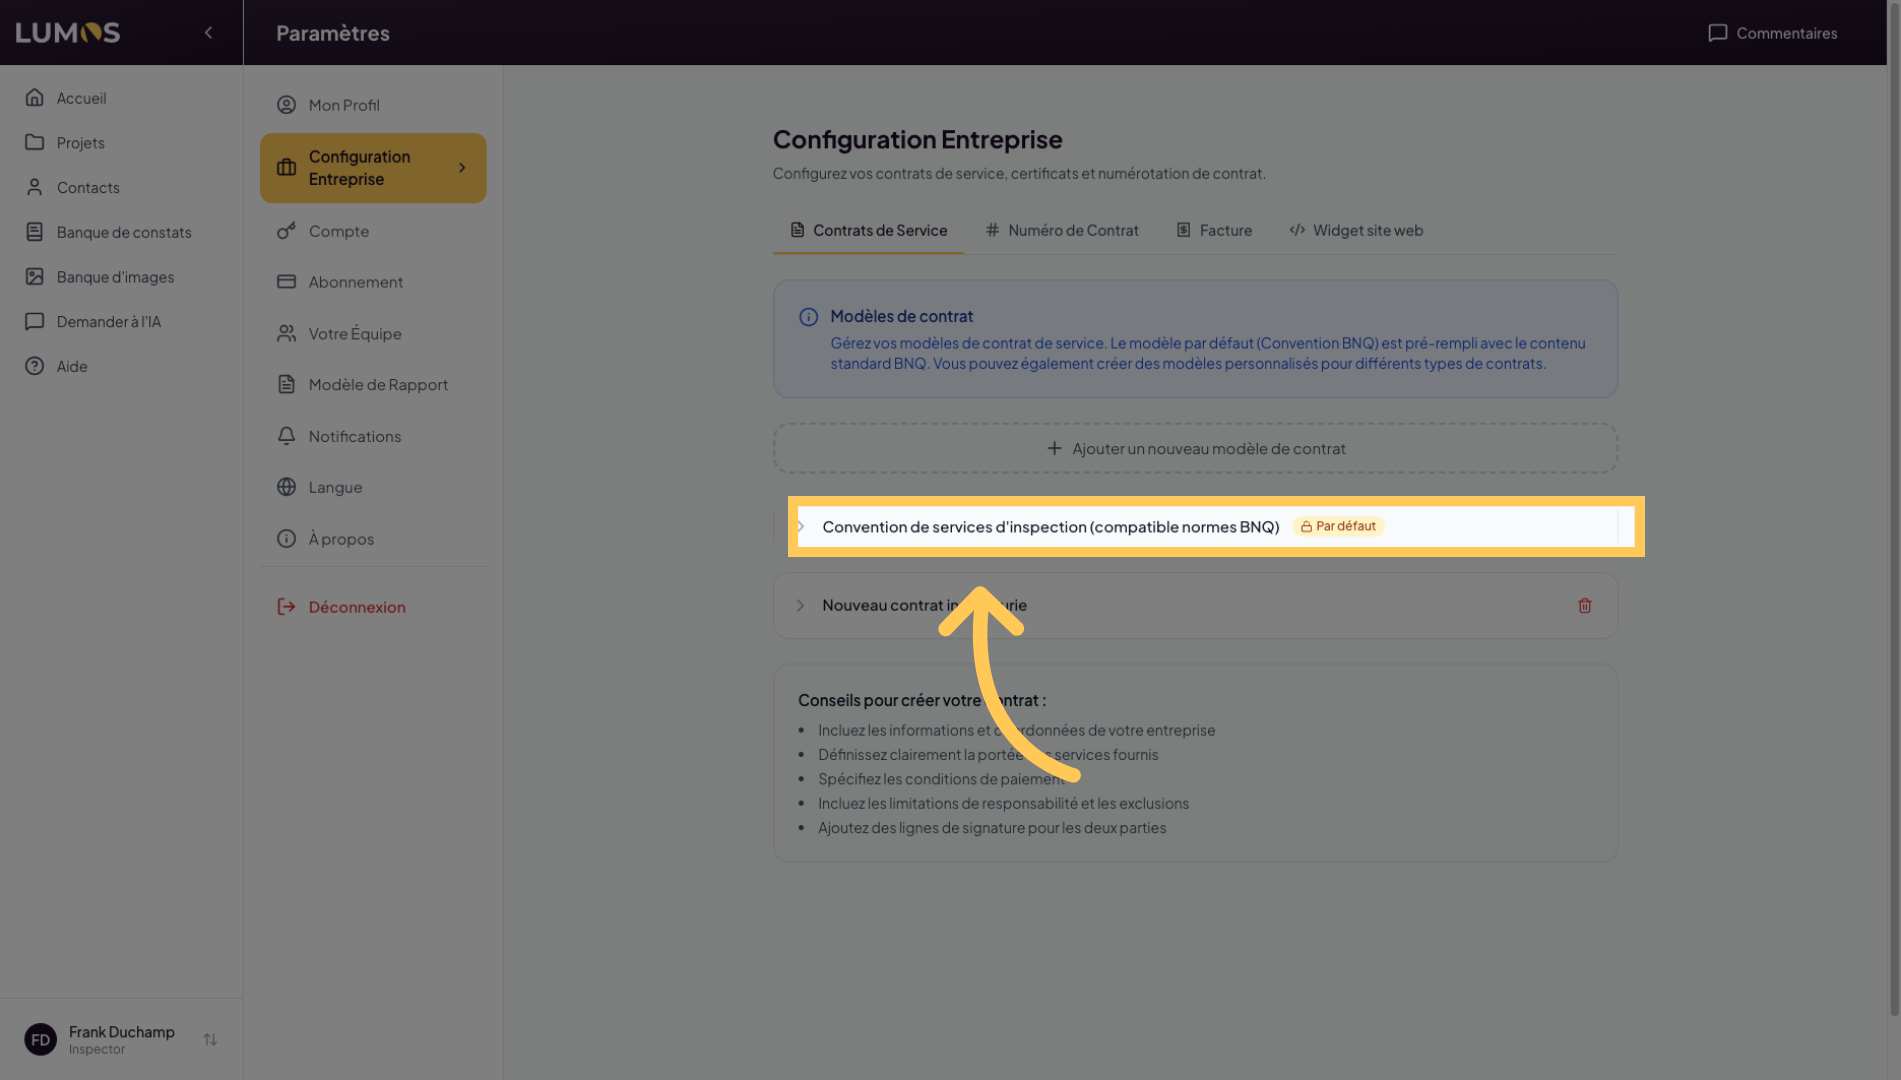
Here you can manage your service contracts, contract numbers, and much more.
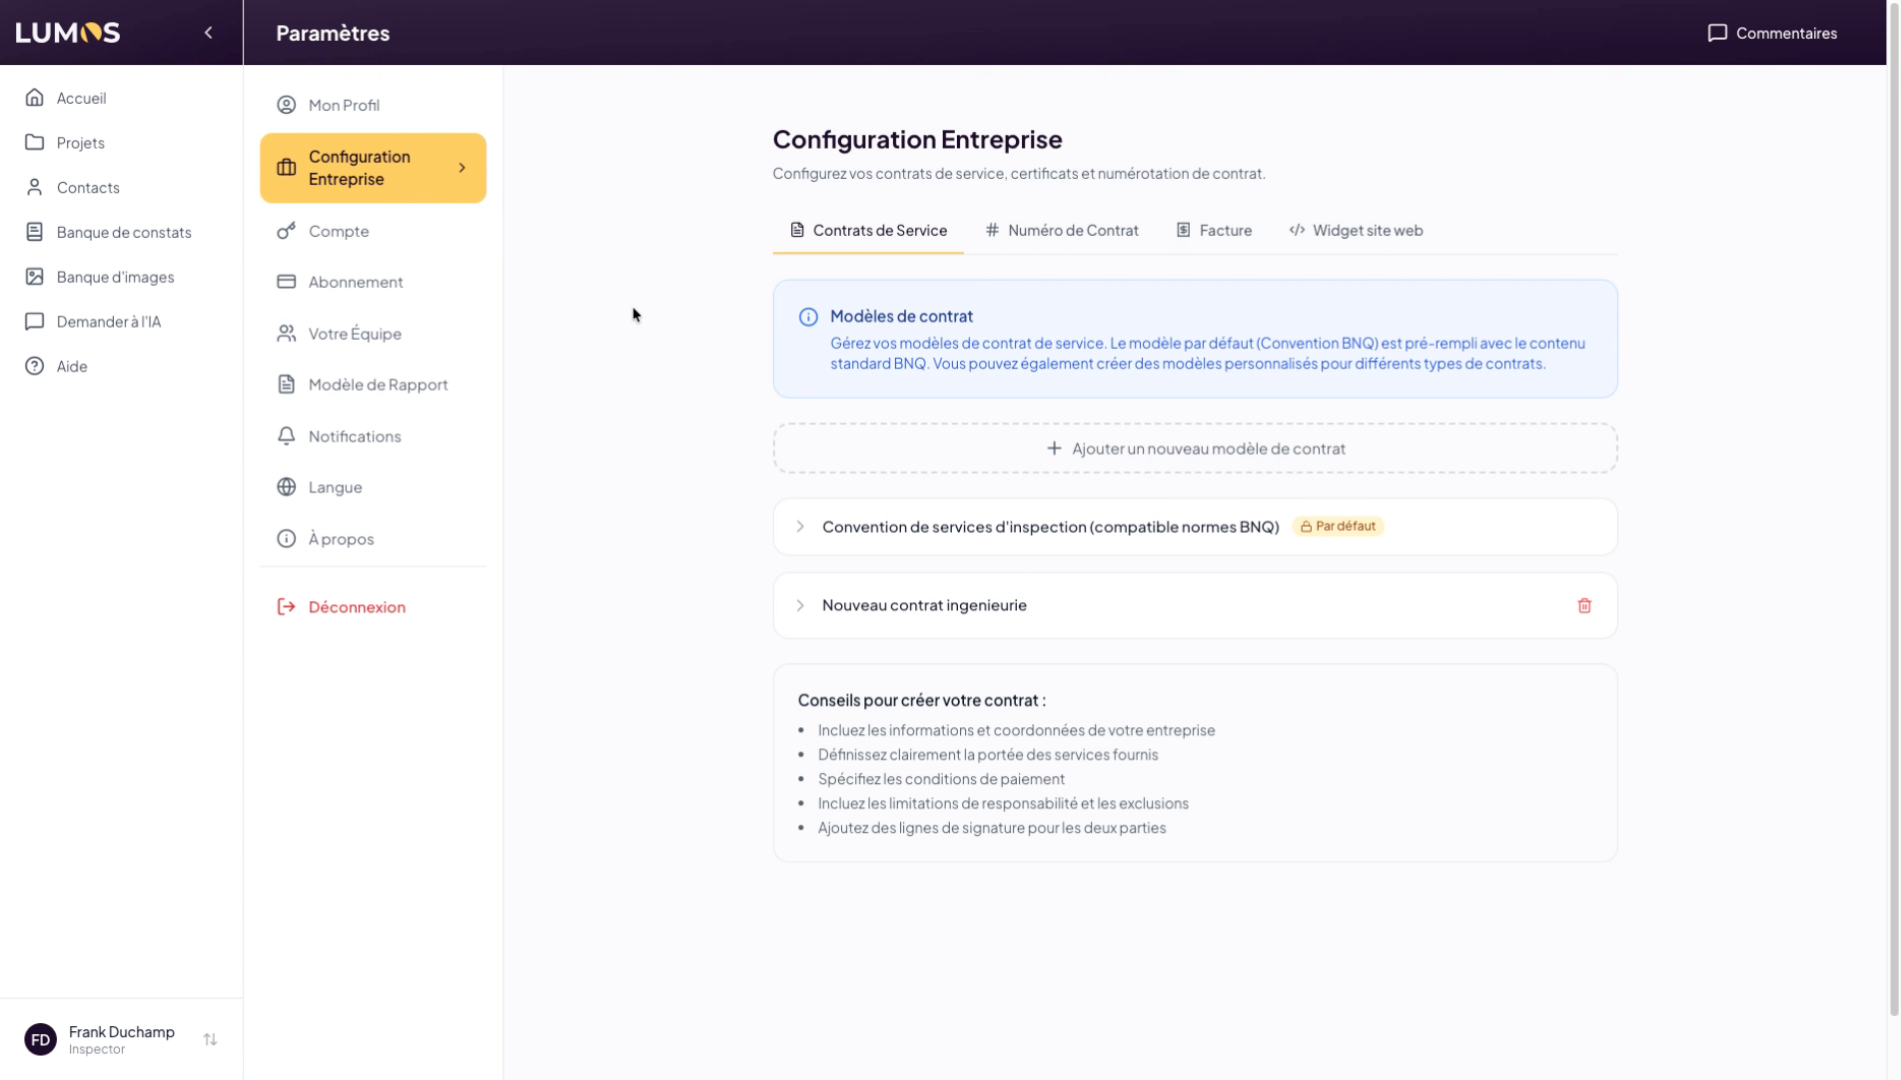
13. Access Contract Creation
Click here to start creating your service contract.
14. Create a Lumos Service Contract
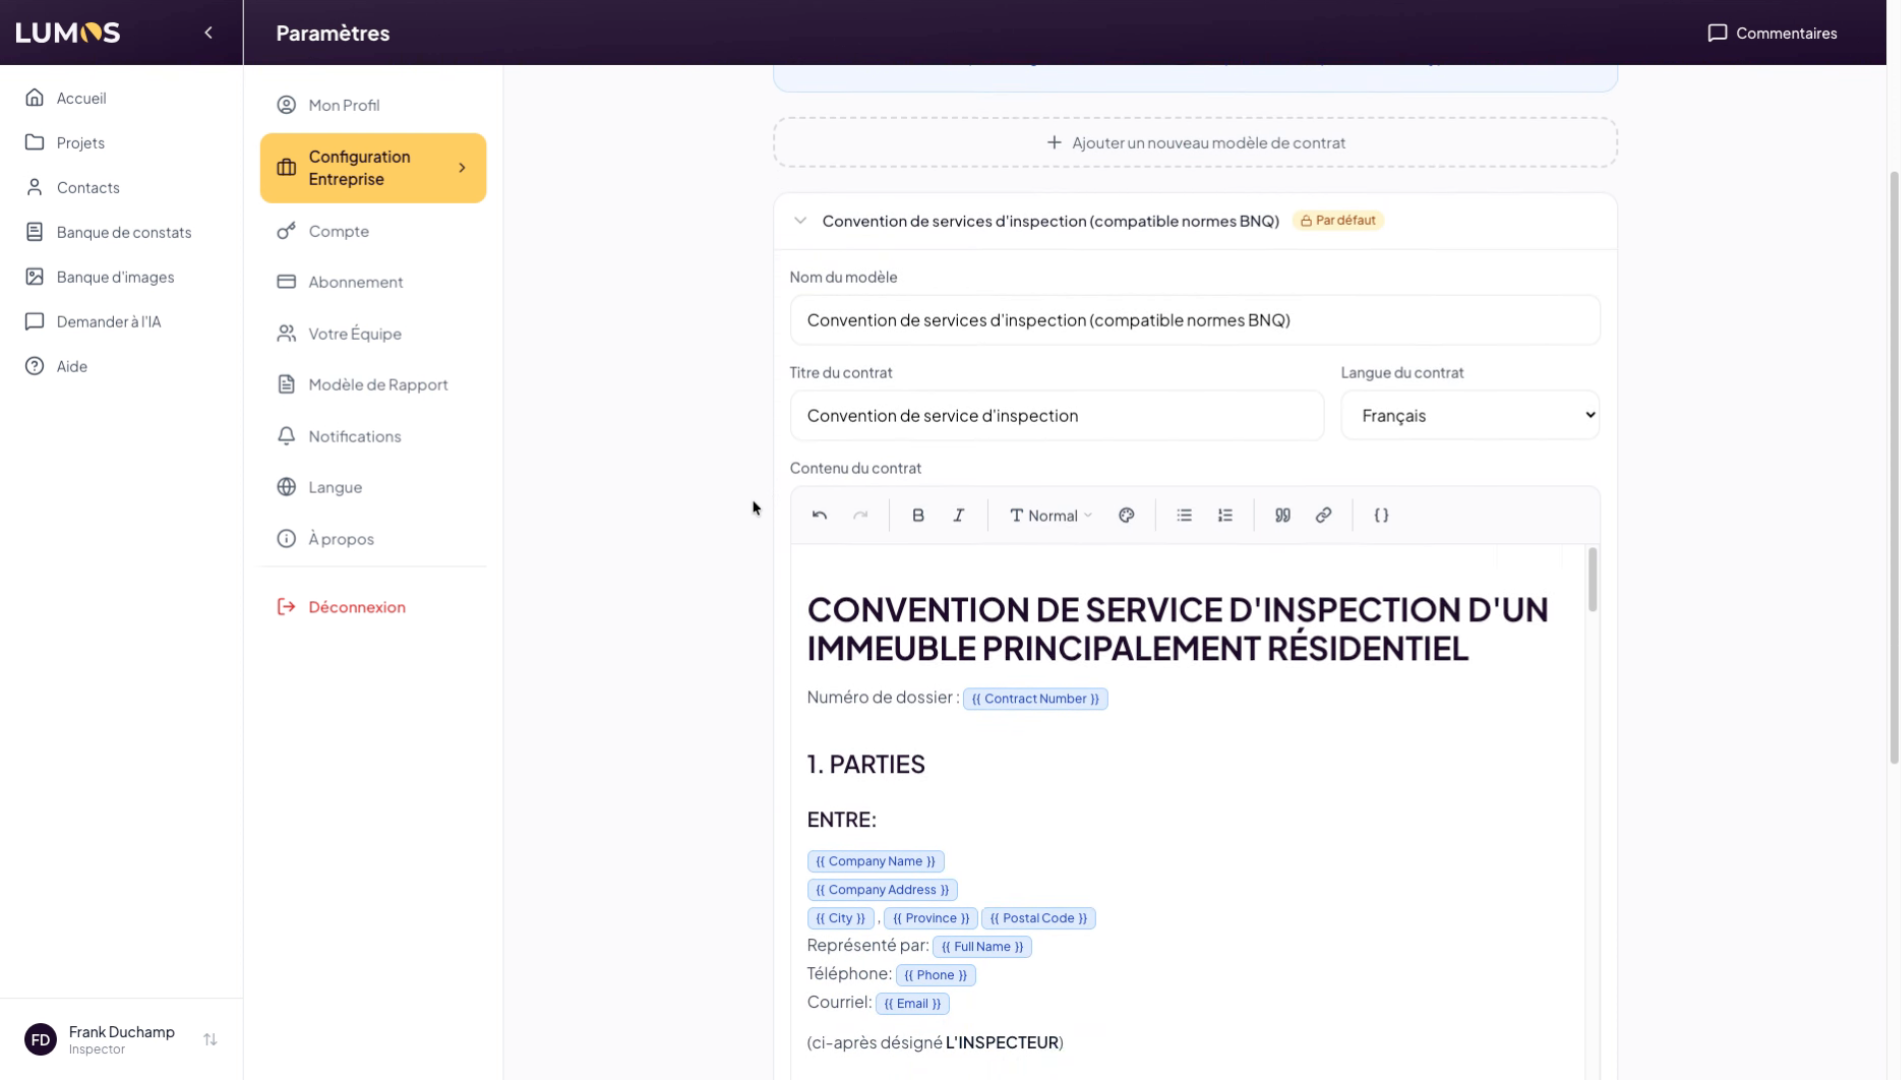
15. Customize the Service Contract
You can create your own service contract by clicking the button above. In your new contract, simply insert your text or documents.

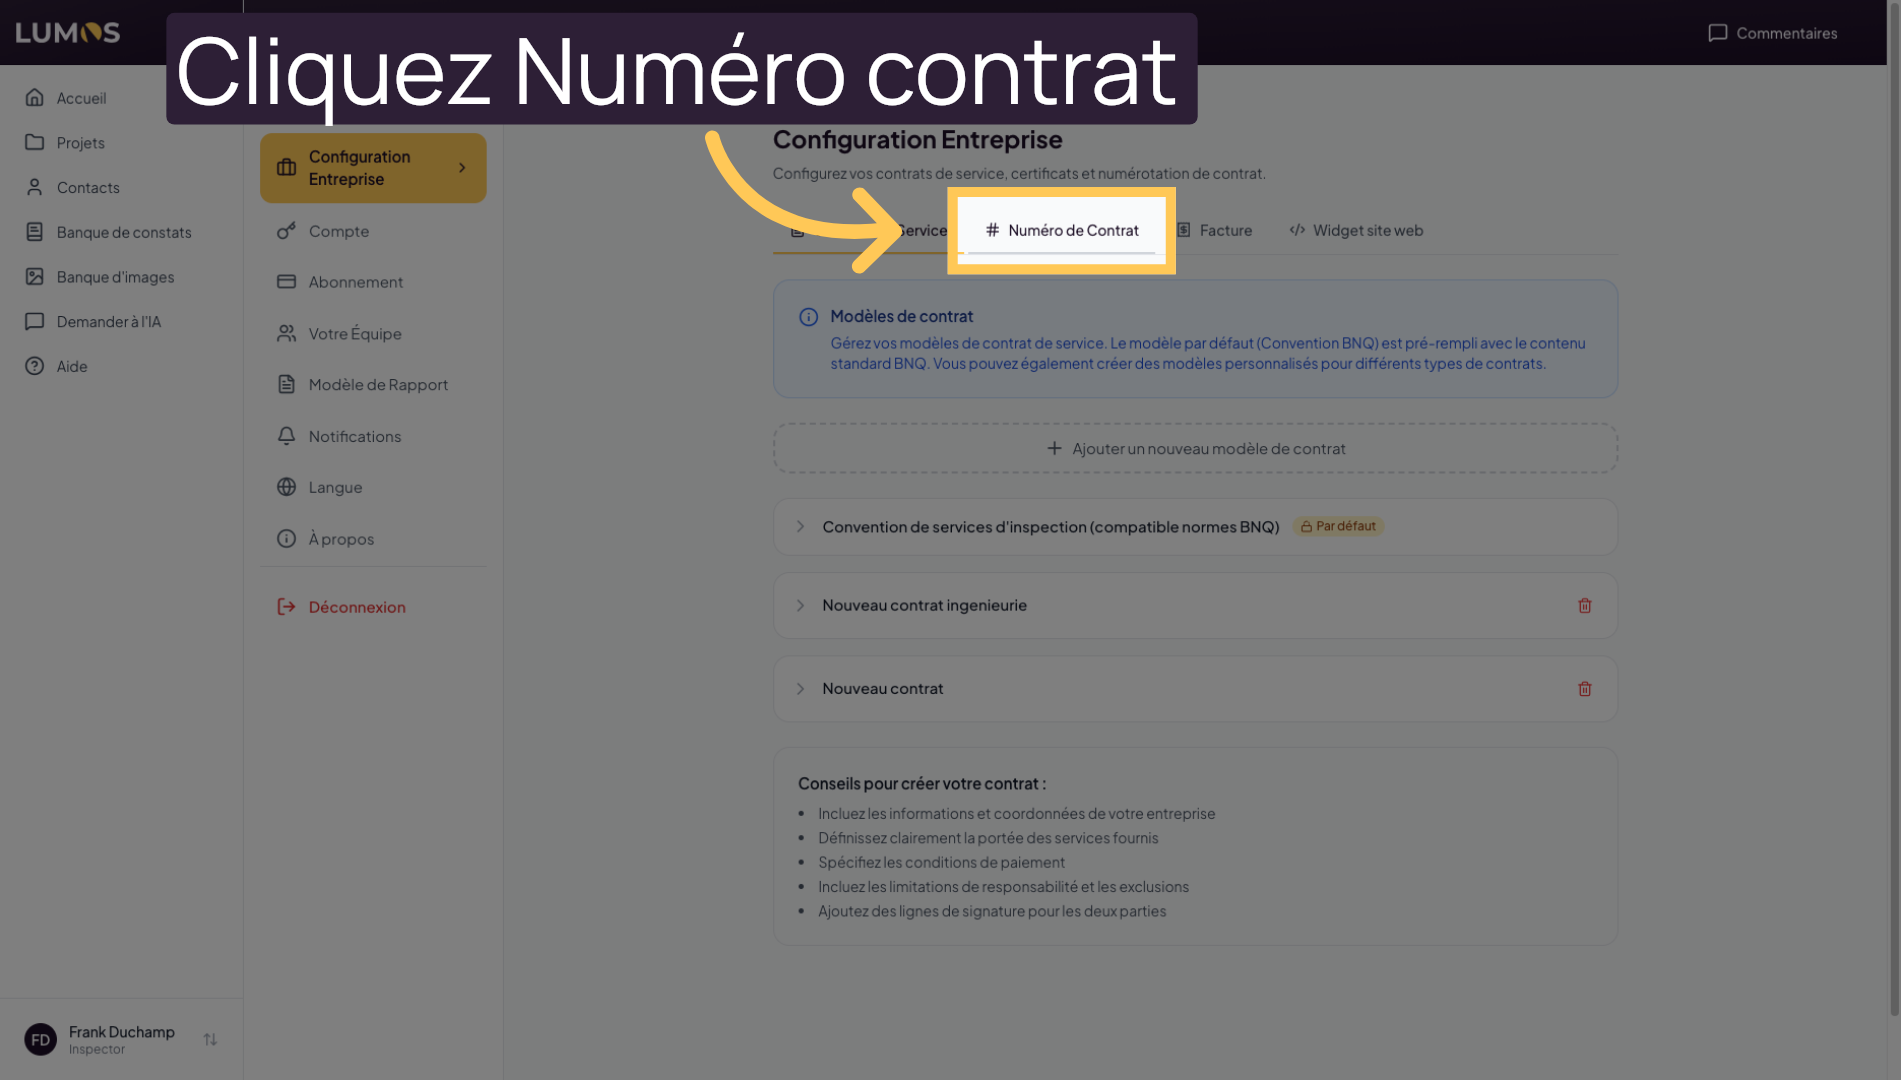
16. Select the Contract Number Field
Click on “Contract Number” to configure your contract numbering.
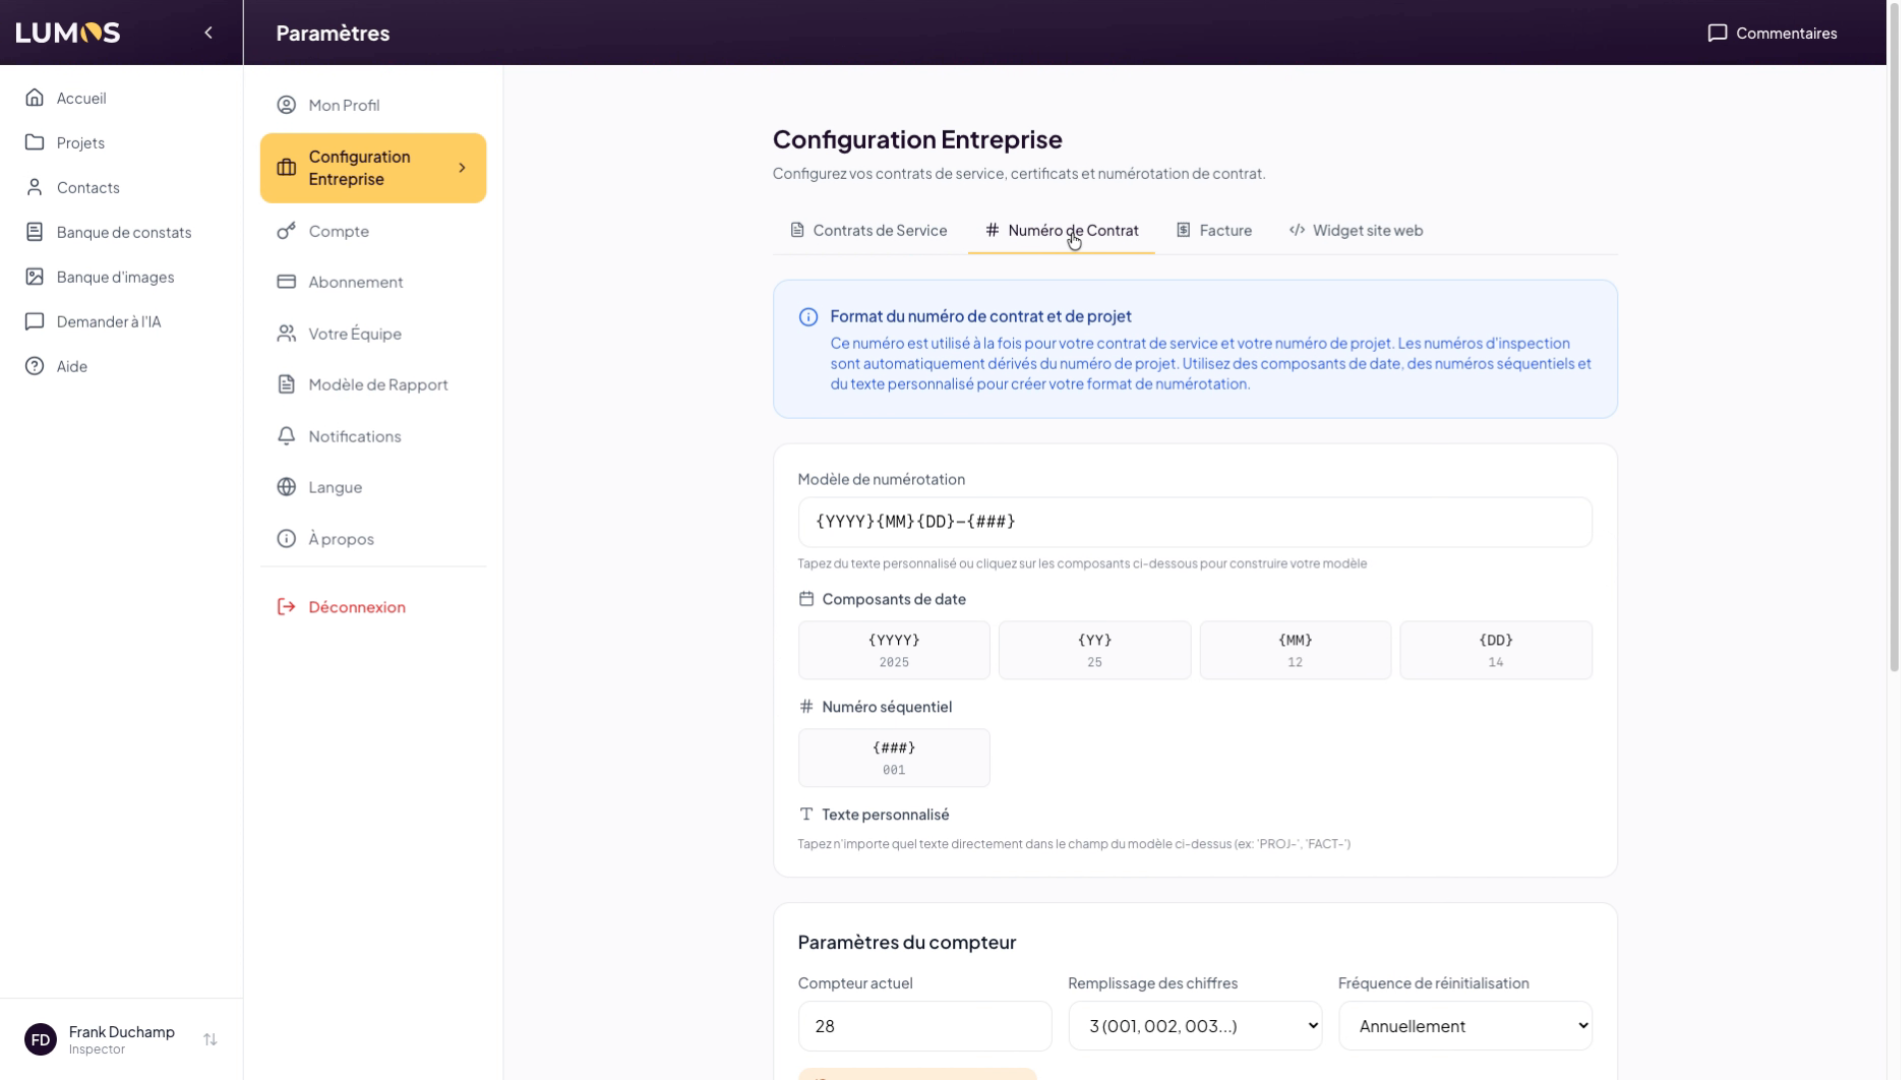
17. Configure Contract Numbers
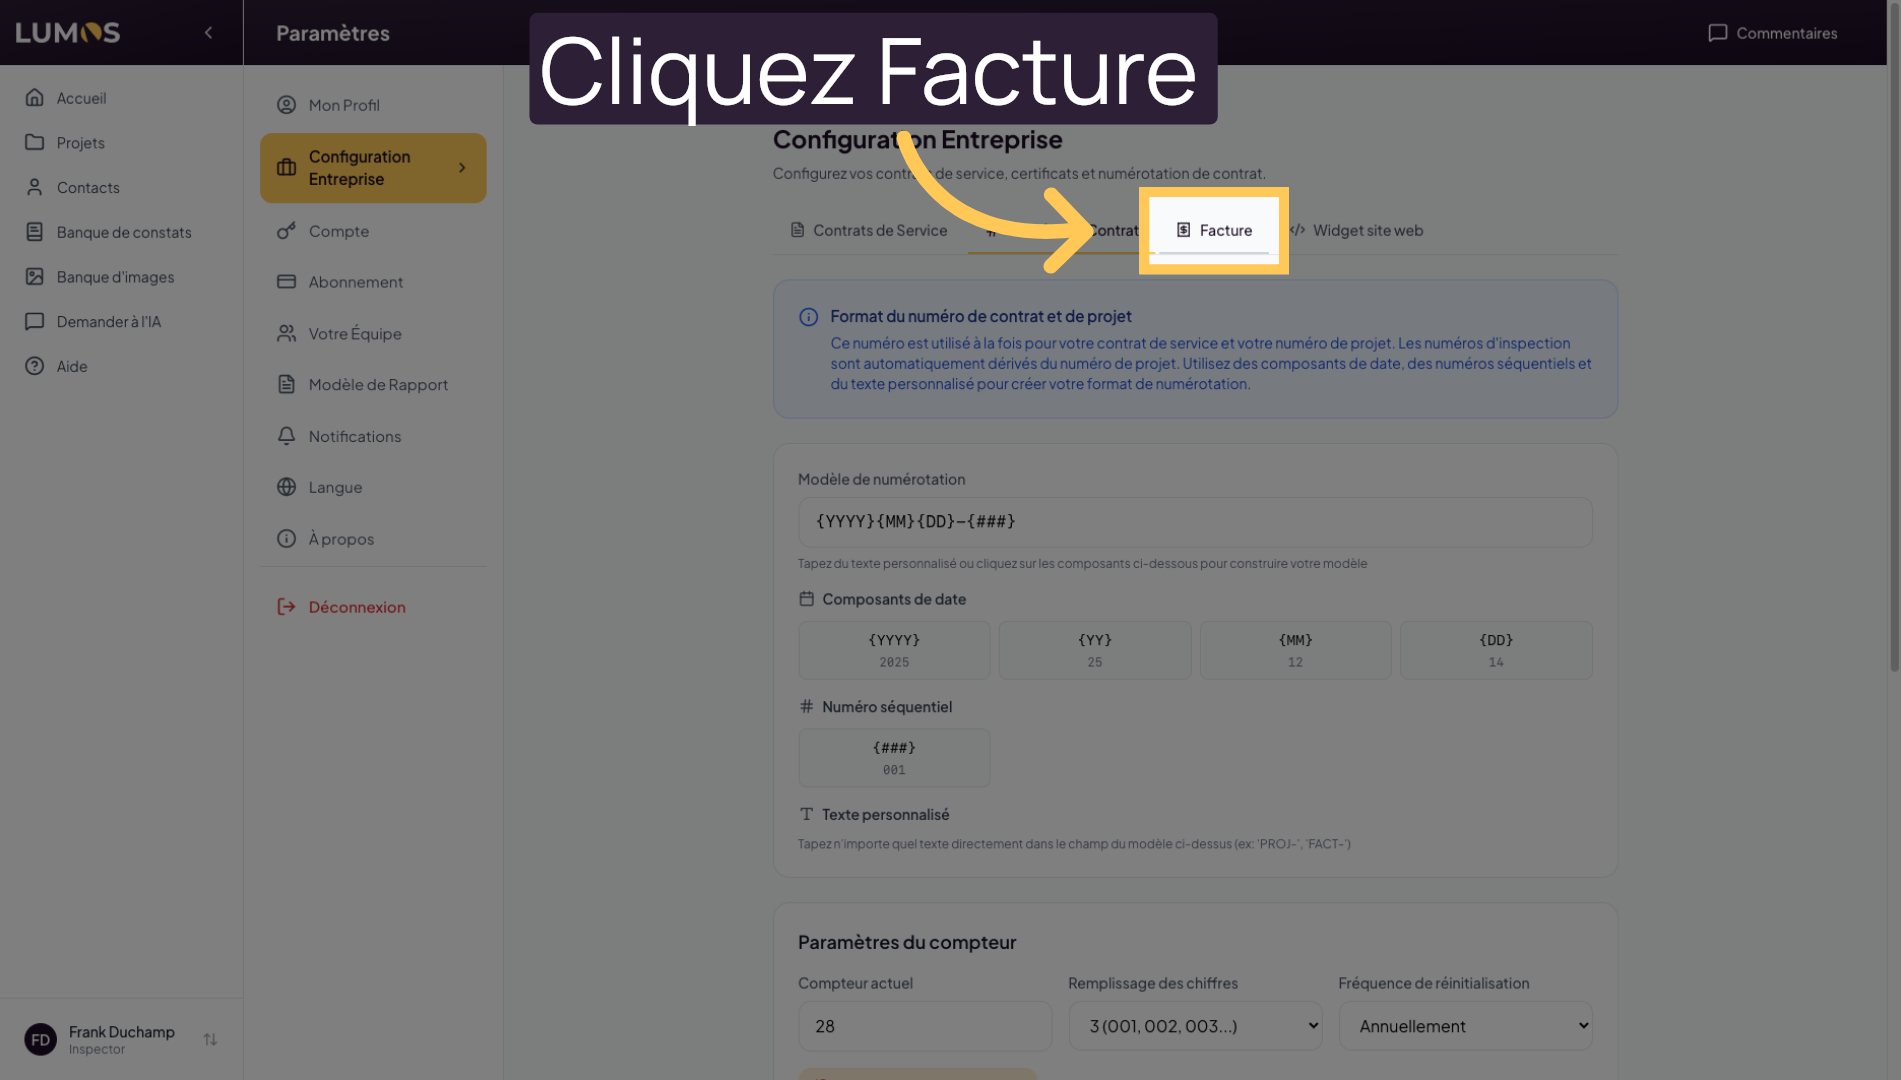
18. Access the Invoice Tab
Click on the Invoice tab to manage your invoice settings.
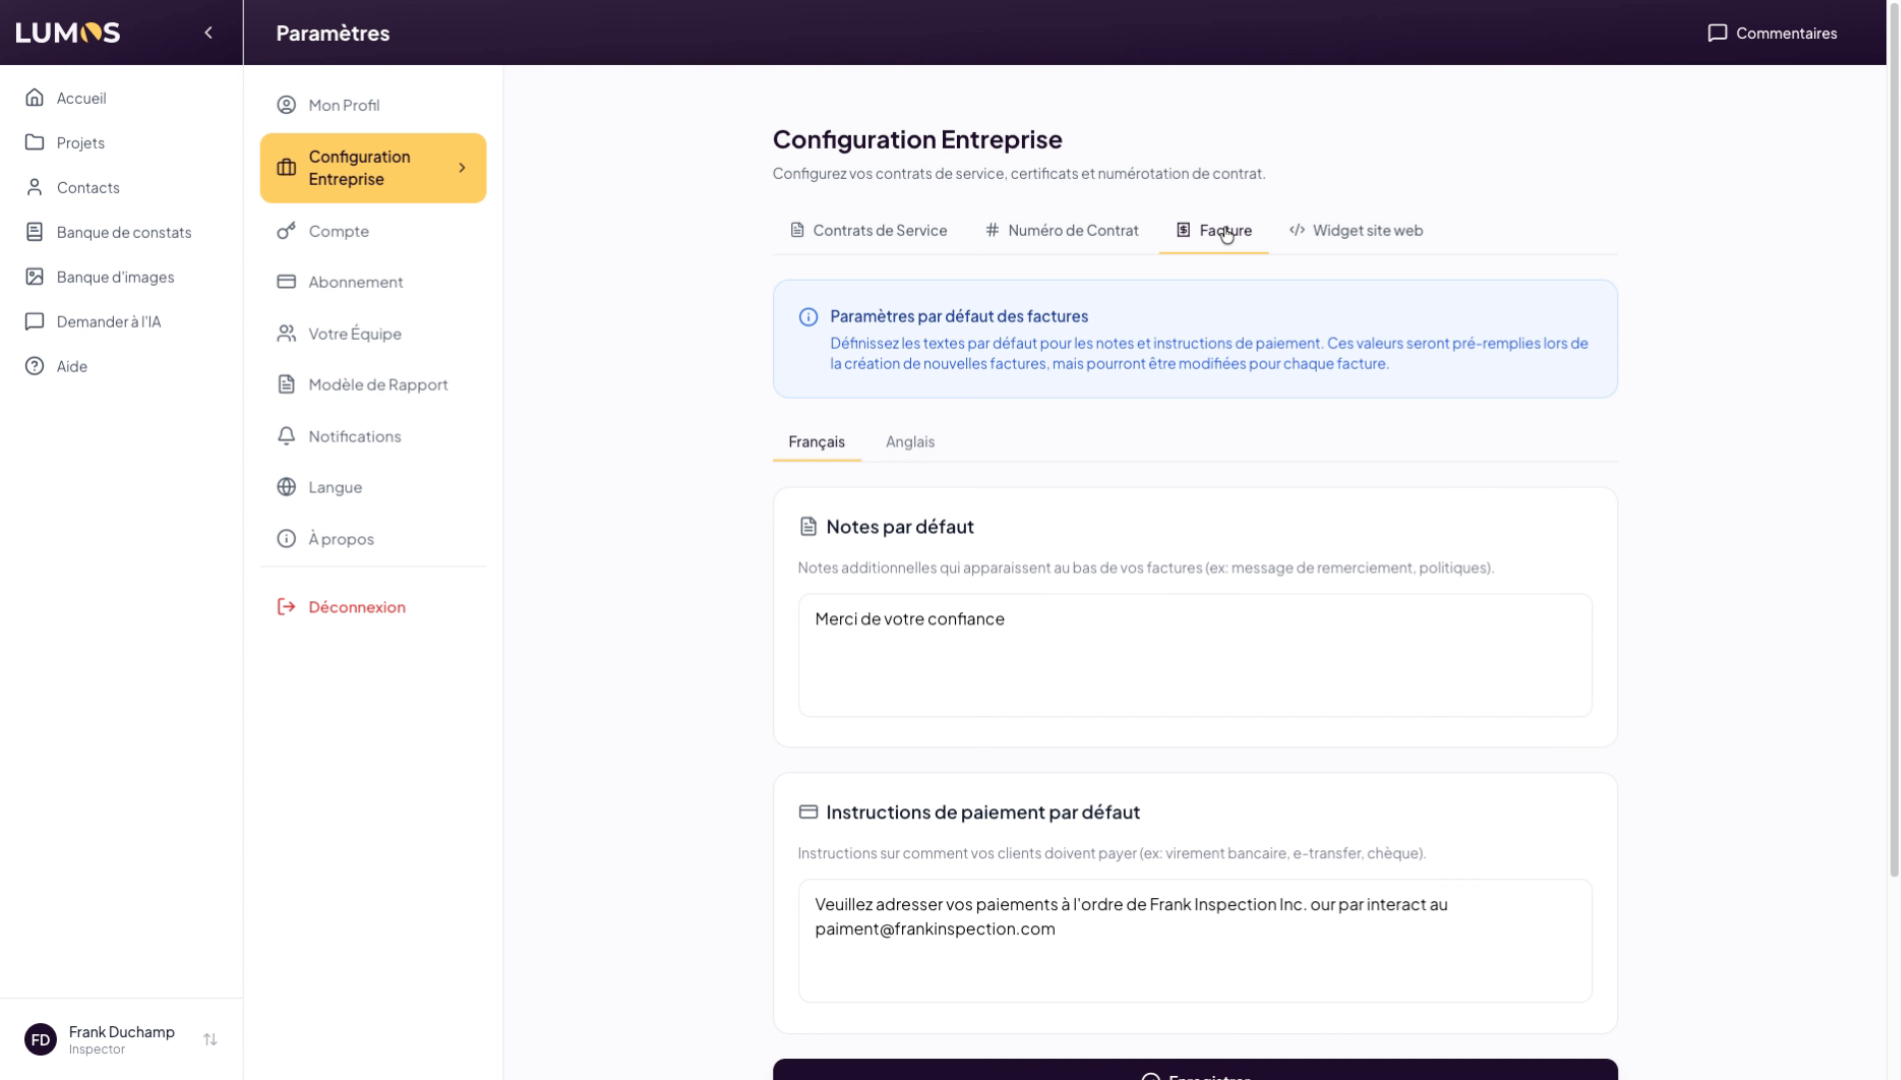
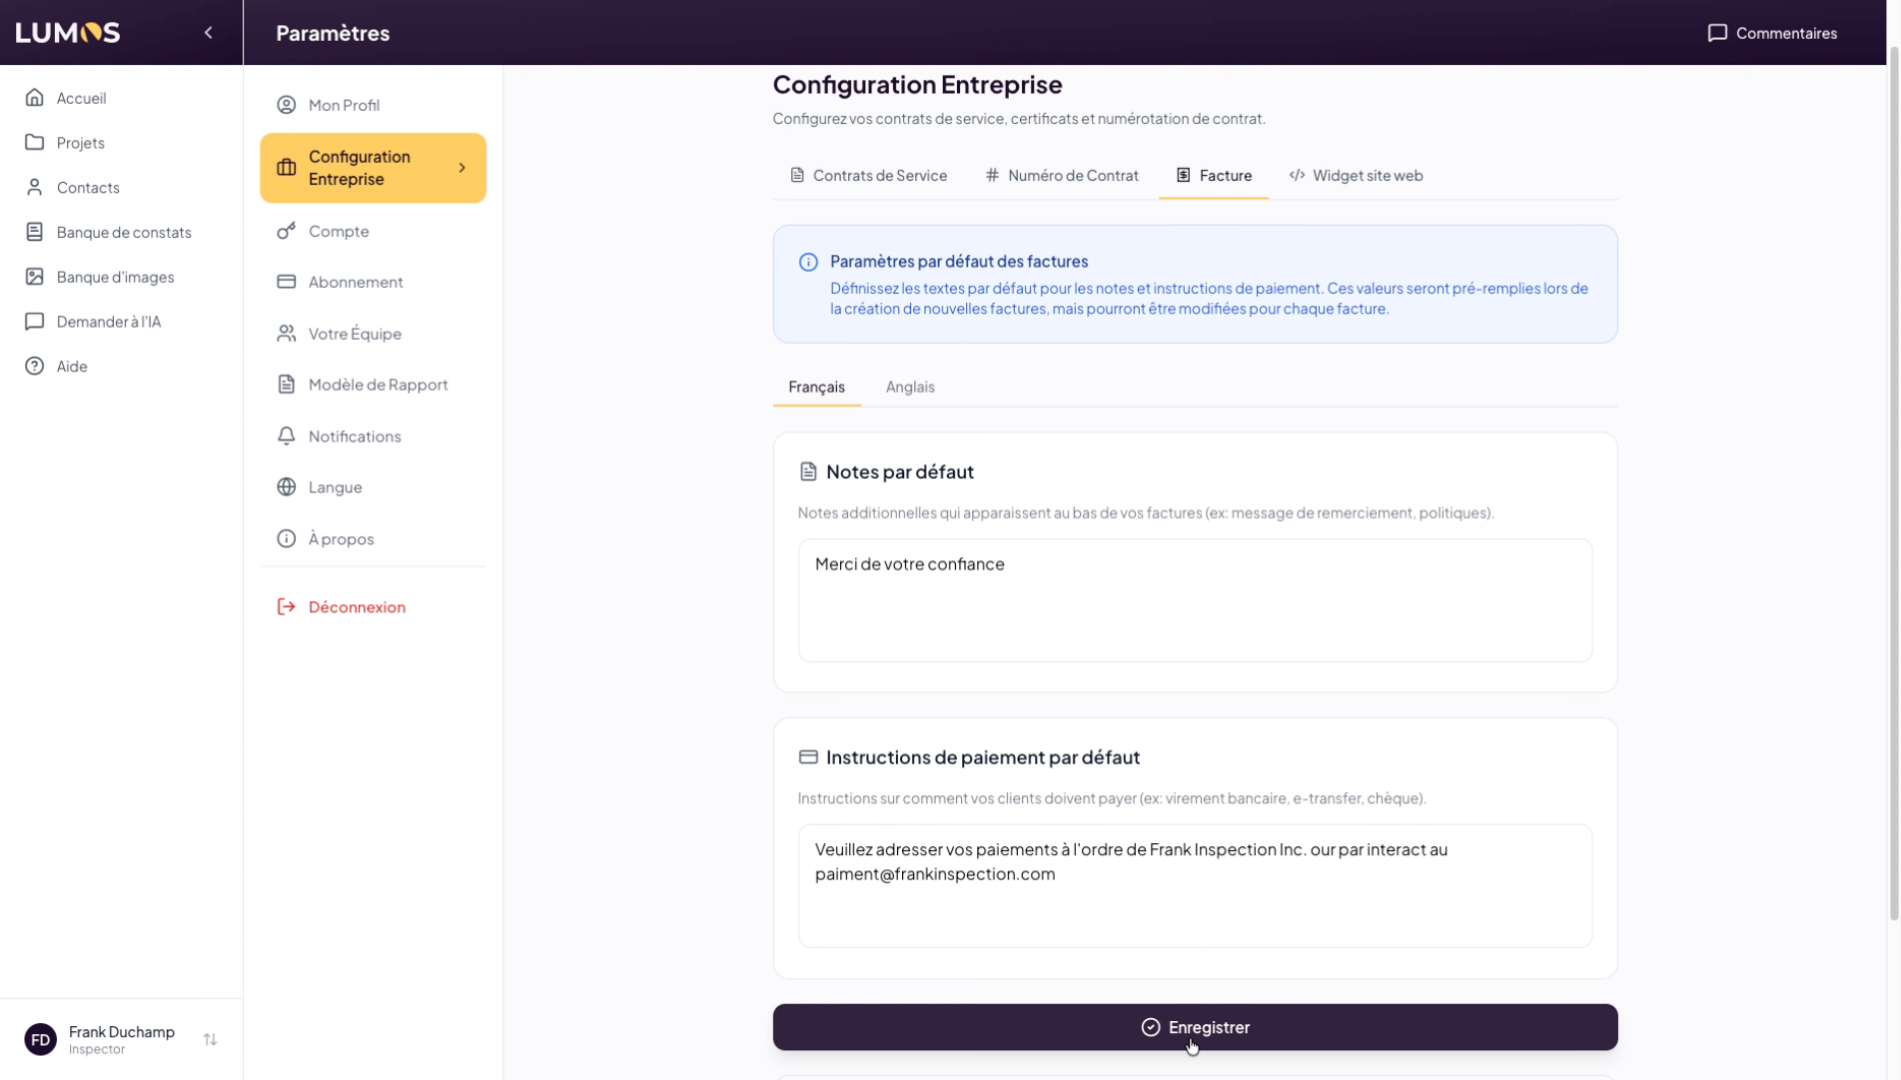
19. Add Default Notes to Invoices
20. Save Changes
You have successfully configured your Lumos account and profile, including your personal information, logo, contracts, and invoicing settings. To go further, explore advanced user management or report customization.