Create a custom narrative in the bank
You have two main reasons to add a narrative to your bank: capitalize on a phrasing you wrote in an inspection, or cover a topic absent from the default Lumos bank.
Three ways to write
Lumos offers three writing paths, which combine as needed:
- From scratch — you write entirely by hand, panel by panel.
- With AI — you start with a short description of the observation, then click Generate with AI to have Lumos structure the narrative in BNQ format. You adjust to taste before saving.
- From the bank — you start from an existing narrative (Lumos or one of your earlier narratives) and adapt it. Useful for variations on a neighboring narrative without starting over.
The four-part structure (BNQ 3009-500)
Every narrative in Lumos follows the four-part structure prescribed by BNQ 3009-500 for residential inspection reports:
- Identification (required) — the factual description of what you identified.
- Role / Function — the role or function of the component.
- Consequences — potential consequences if not addressed.
- Recommendation — next steps (intervention, monitoring, additional expertise).
Each part can be included or excluded from the report via an Include in the report toggle on its panel.
This is the structure your clients find in the final report, and it is what makes your work standard-compliant.
Start the creation
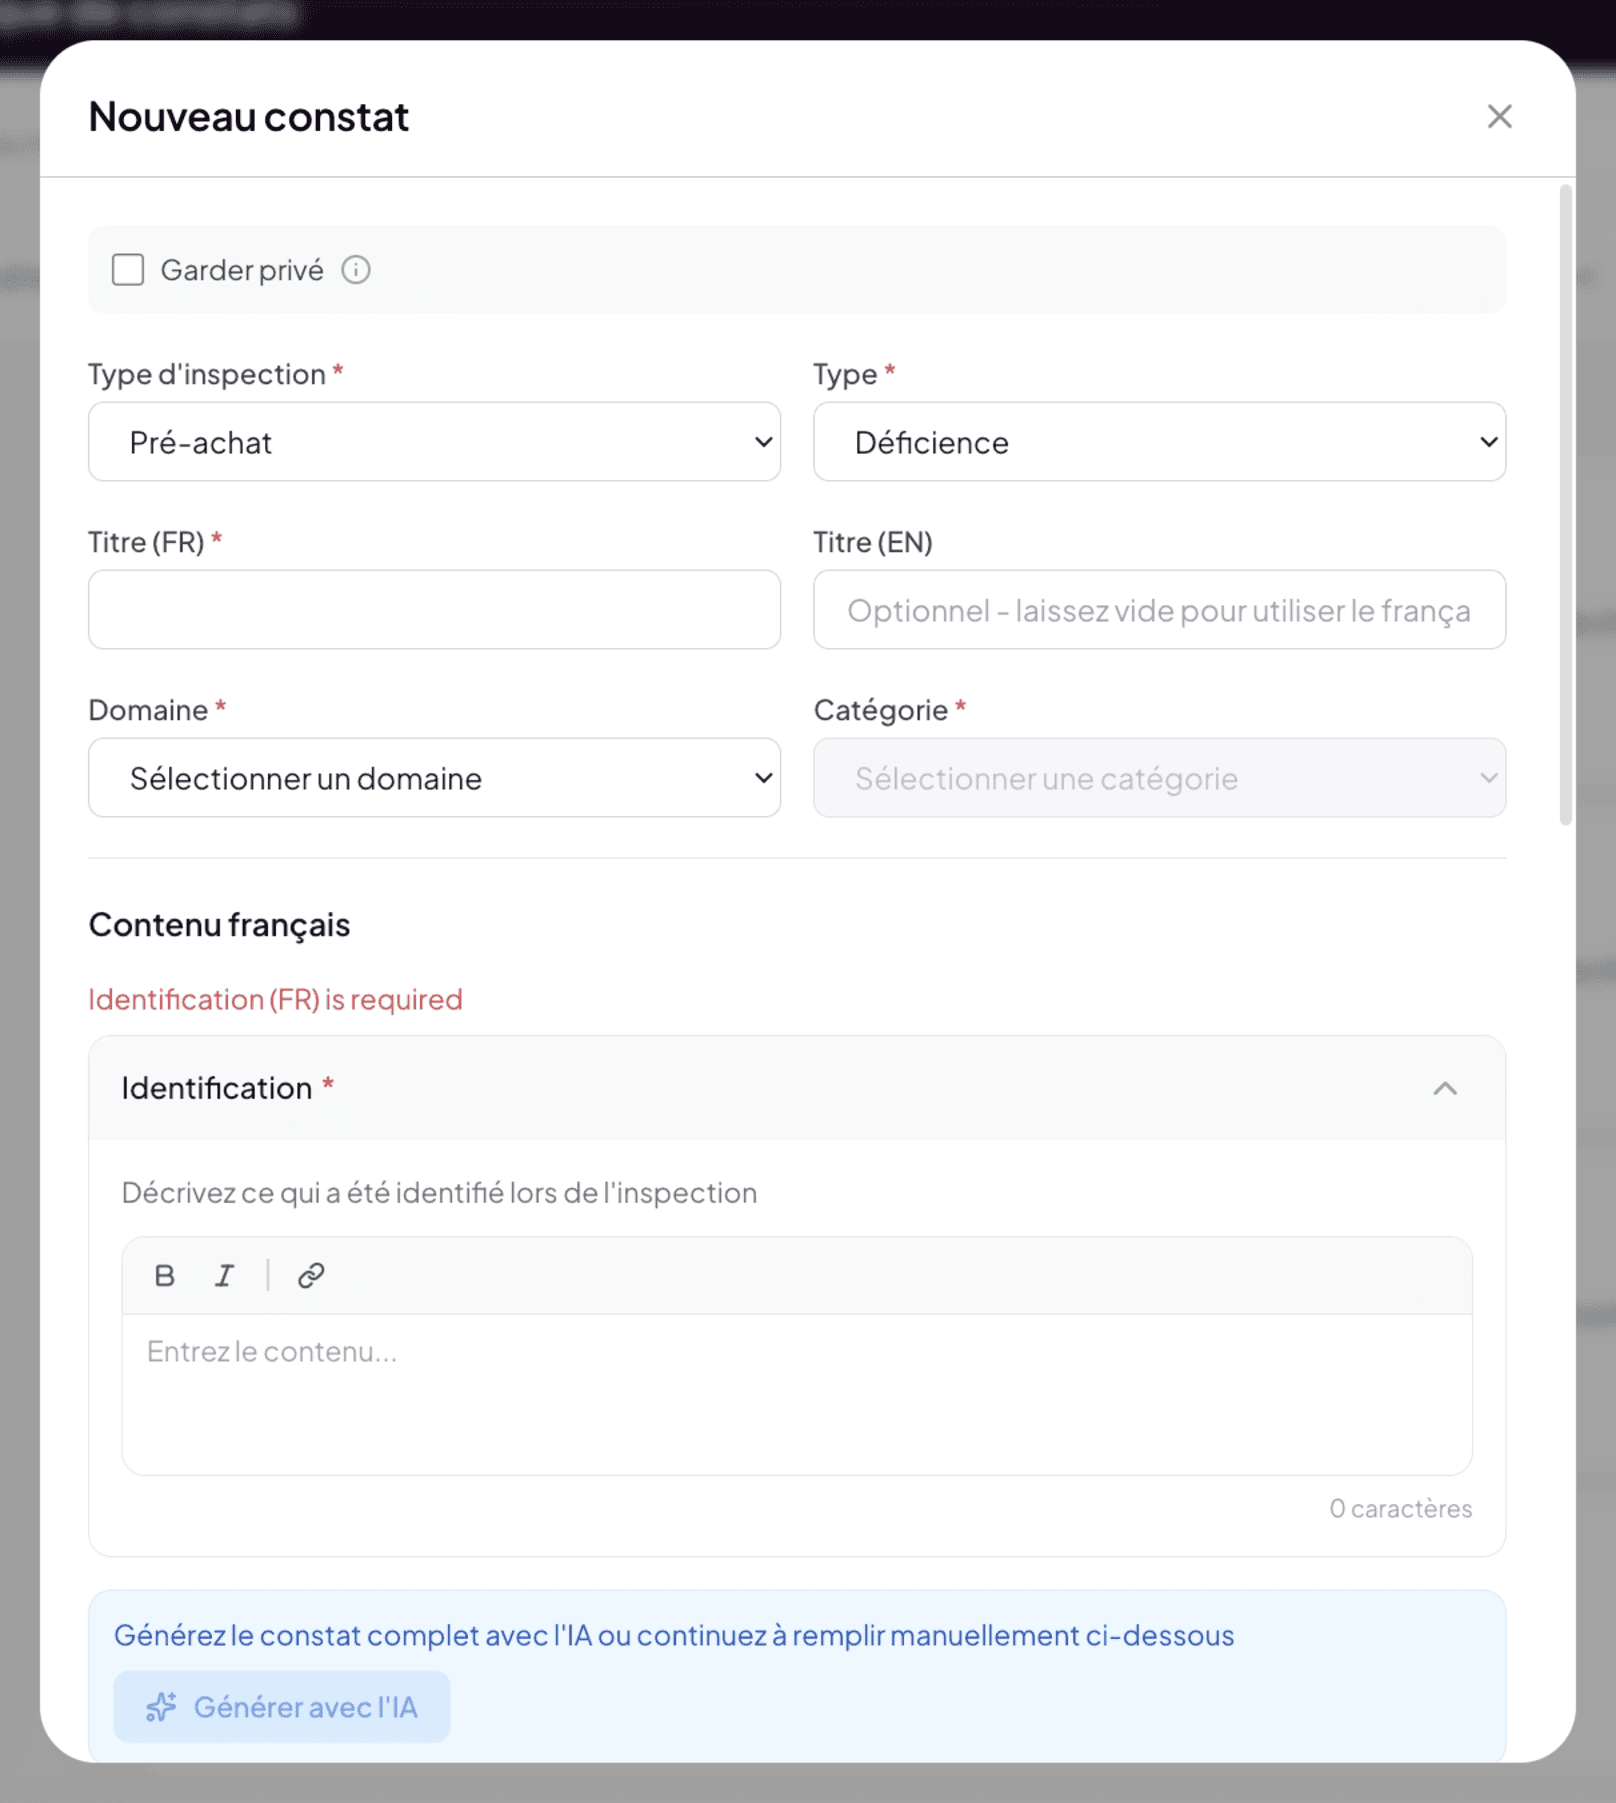
On the standalone bank page (/narratives-bank), click the Add button in the header. A creation modal opens, identical in structure to the one shown when creating a custom narrative from the inspection editor.
Fields to fill in
Header
- Section required — the building section.
- Subsection required — the specific subsection.
- Type required — Deficiency, Information, Limitation, or Method. See The four narrative types.
- Severity required — chosen from the levels configured by your template. The default BNQ template offers 7 levels: No problem, Monitor, Warning, Deficiency, Urgent, Specialist Required, Hazard. Your severities may differ if you have customized your template.
Narrative title
A short label that will appear at the top of the narrative in the report and in the bank list.
The four parts
Fill in the panels per the BNQ structure.
Identification is the only required part. For Information or Limitation narratives, identification is often enough. For Deficiencies, ideally fill in all four to give the depth the standard expects.
Deadline phrase — a toggle in the Recommendation part automatically adds wording about the recommended intervention timeframe (immediate, short-term, medium-term, monitoring).
Writing and AI
Below the Identification editor, the Generate with AI button triggers automatic generation of the full narrative. Click it after writing a short description of the observation so AI proposes a structured phrasing.
AI proposes, you decide. Validate and adjust before saving. See AI as accelerator.
Display options
The Use sections in the report checkbox controls whether the subheadings (Identification, Role, etc.) appear in the final report, or whether paragraphs follow each other without intertitles. Choose based on your deliverable style.
Writing best practices
- Observation verb at the start of Identification: We observed that…, We note that…. This is the BNQ standard phrasing.
- Factual and neutral in Identification; judgments go in Consequences and Recommendation.
- Avoid inspection-specific determiners (“this window”, “here”). Prefer generic phrasings so the narrative stays reusable.
- Use variables if relevant (
{{Property Address}}, etc.).
Save
The Add narrative button adds the narrative to your bank. It immediately becomes available in the pre-shown list of the matching subsection, the next time you open an inspection.
Best practice: capitalize from your inspections
The best source of custom narratives is your own writing. When you write a custom narrative in an inspection and feel it is well-tuned, take 30 seconds to save it in the bank. You will never write it by hand again.
After a few months, your personal bank reflects your style and your particular cases. It is a professional asset that grows continuously.
Saving to the bank from a finding
The Save to Bank button is available in a finding’s window, while reviewing a capture as well as in the editor, as soon as the content was written by the AI or edited away from the original bank narrative.
When you click it, Lumos first asks for the title the narrative will carry in your bank:
- If you had typed a custom title in the finding, it is used as is.
- Otherwise, Lumos suggests one, short and descriptive, derived from the identification.
You can edit it before confirming. This title matters: it is what you will read in the bank list and in the narrative picker, and it is what the semantic search relies on. A truncated full sentence makes a poor title; “Outdoor faucet without vacuum breaker” makes a good one.
If the finding has photos attached, the same window asks what to do with them:
- Yes, attach the photos (default) — Lumos copies them into your bank, captions included. Each time you reuse this narrative in an inspection, they come back already attached, like the reference images of a pre-written narrative. They are copies: deleting the photos from the original inspection does not remove them from the bank narrative.
- Just the narrative text — only the text is saved.
An annotated photo is copied as you see it in the finding, annotations included. The bank holds at most 10 photos per narrative.
The narrative is indexed for search as soon as it is saved. If indexing fails at that moment, for example without network, Lumos retries it automatically within the hour: nothing to do on your side.