The Contacts address book
The Contacts page in the main sidebar gathers all the parties you encounter in your activity: clients, sellers, real estate agents, partners. Every inspection project is tied to at least one contact (the client) and may reference several (client’s agent, seller, seller’s agent, etc.).
List view
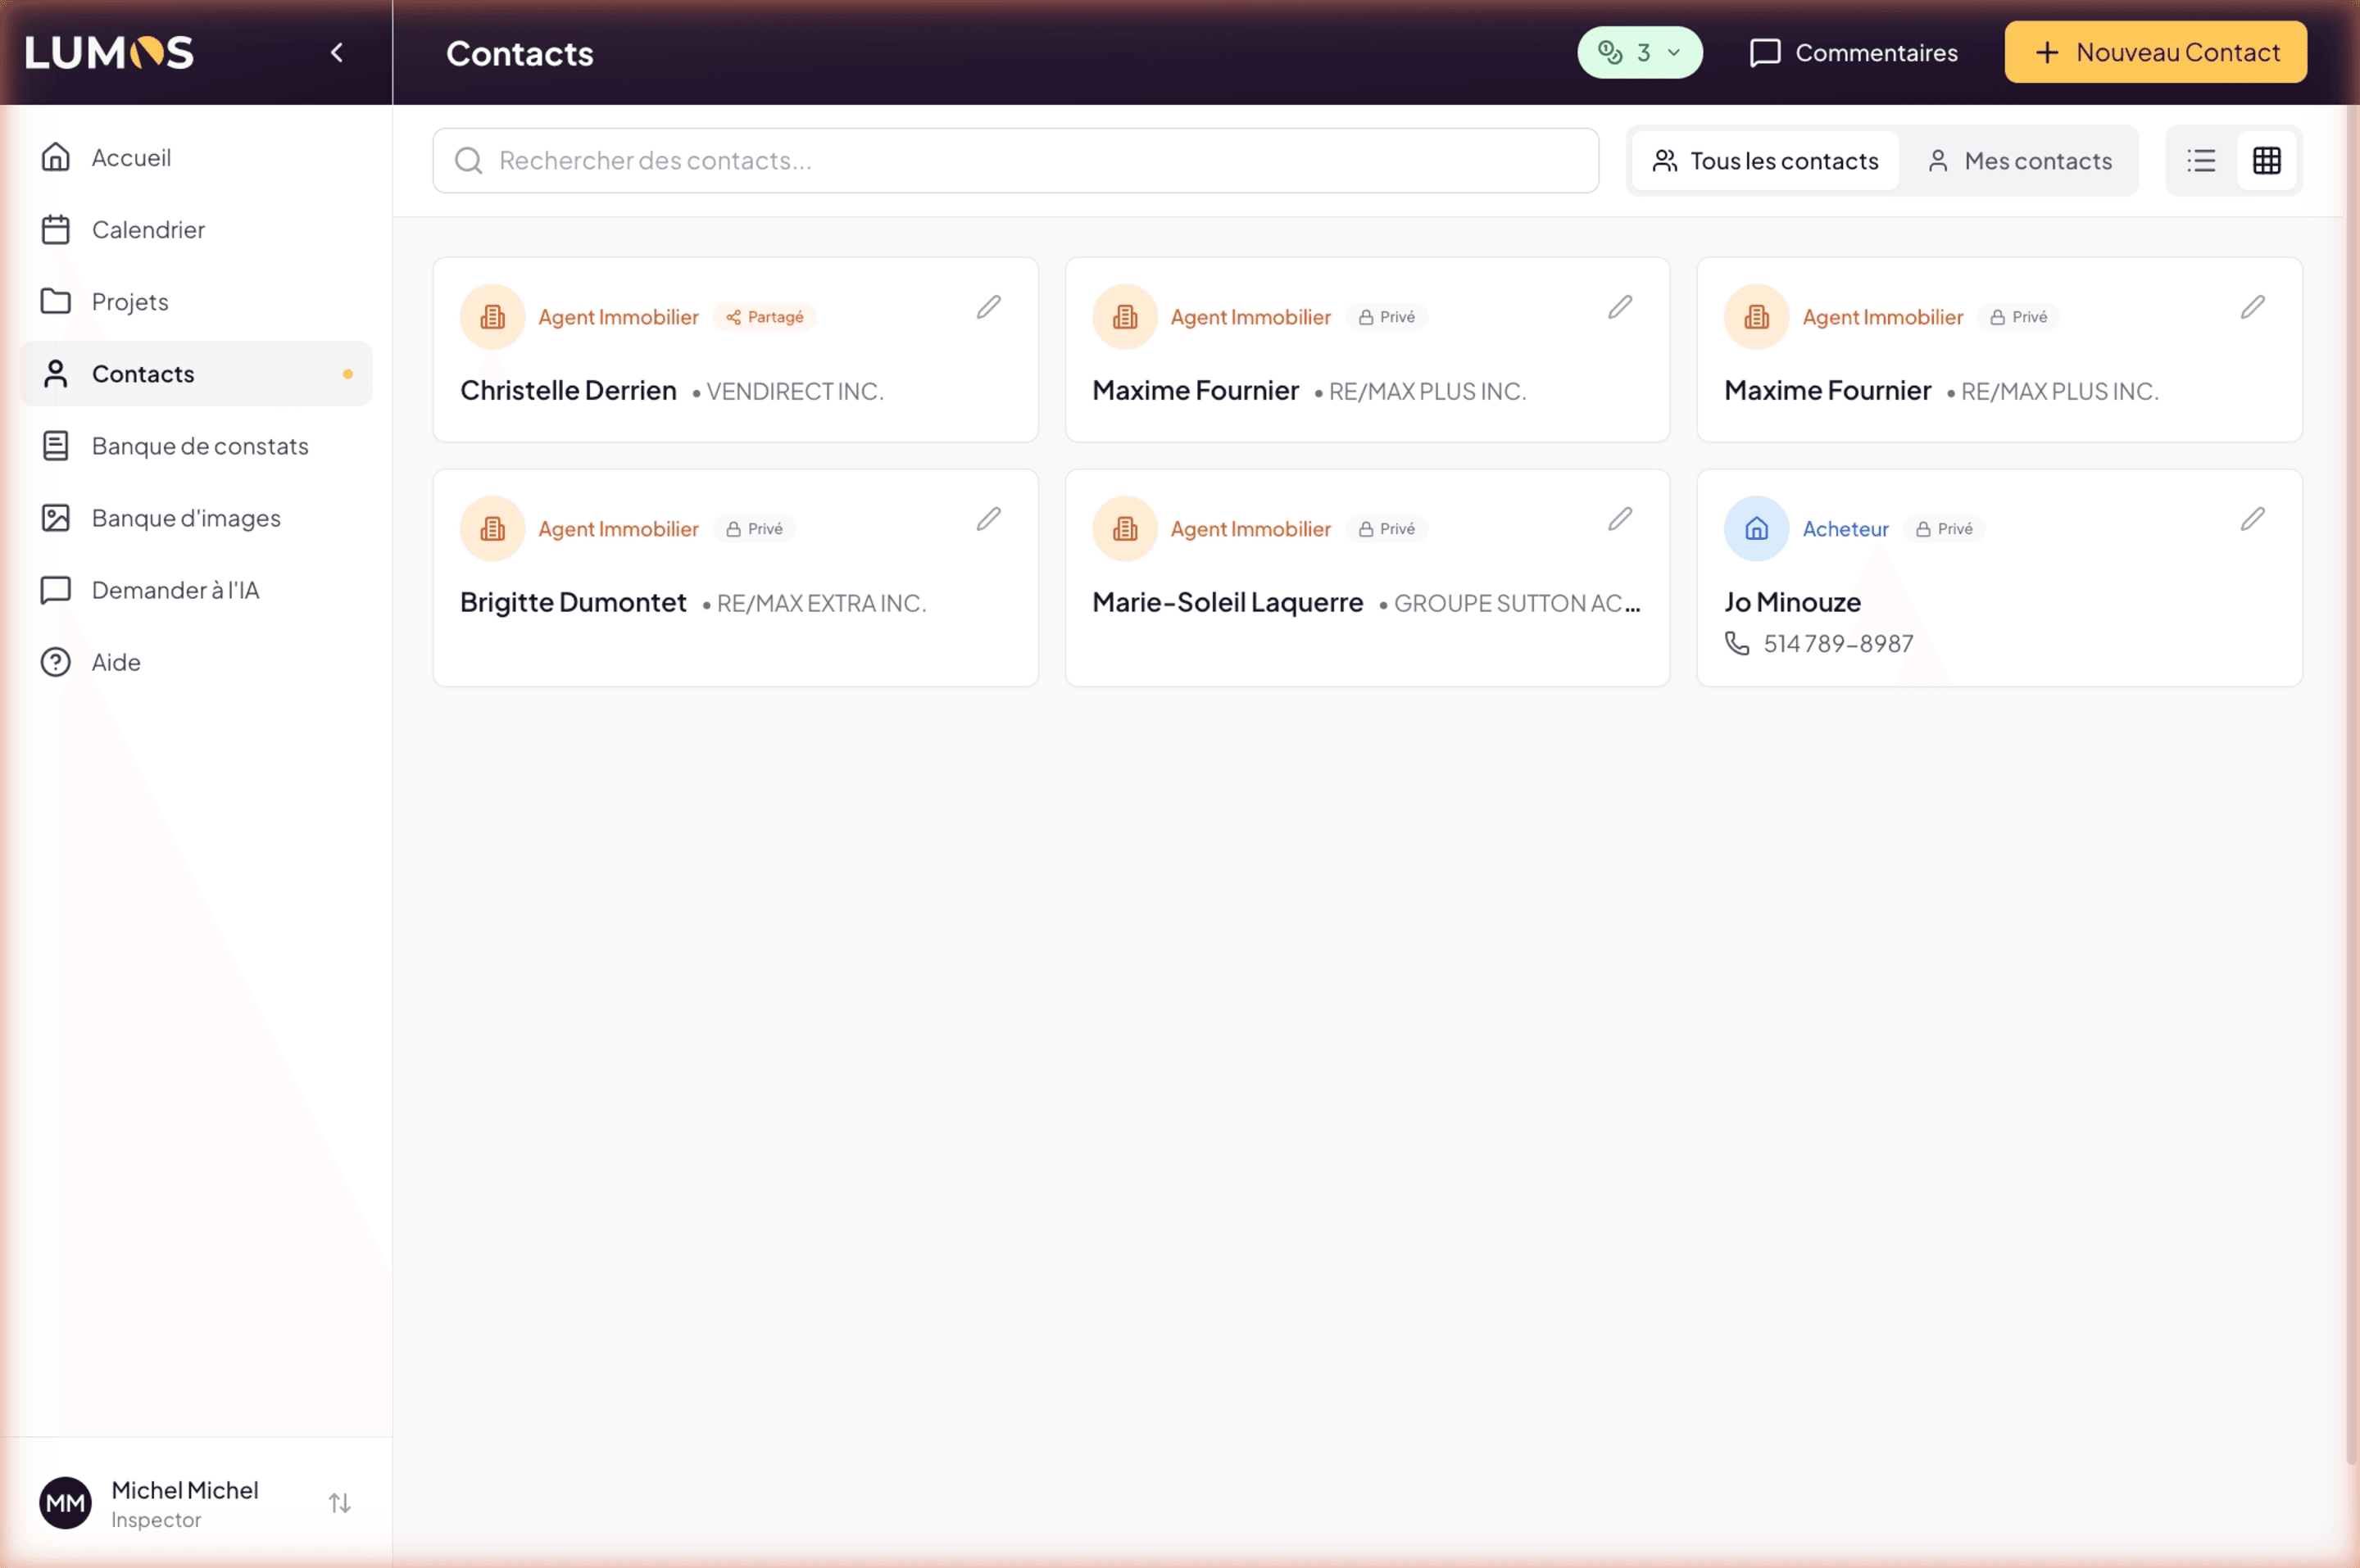
The page offers two displays, list and grid, switchable via the icons at the top right. A search bar above filters by name, and a All contacts / My contacts toggle reduces the address book to your own contacts (useful in a team).
Each contact card displays:
- The type (colored badge, see below)
- Privacy (badge Private or Shared)
- The full name
- The email and phone if filled in
- The address if filled in
- For a Real Estate Agent, the agency below the name (e.g. EXP AGENCE IMMOBILIÈRE)
- For a Subject-Matter Expert, the specialty or business (e.g. Dewalt Renovation)
A pencil at the top right of the card opens the contact in edit mode.
The seven contact types
When creating a contact, you choose its type from seven options shown as cards:
- Buyer — the client who orders the inspection. Default type. On contracts and reports, this contact appears as the Client (the official term per BNQ).
- Seller — the seller of the inspected property. Useful for building access details (keys, code, time restrictions).
- Owner — the current owner, distinct from the seller in cases where the transaction is not a direct sale (estate, mandate, etc.).
- Inspector — a fellow inspector, for example for co-inspections or cross-references.
- Real Estate Agent — the agent representing the buyer or the seller. Agency field available.
- Builder — a builder or contractor, useful for inspections on new or recently renovated buildings.
- Subject-Matter Expert — a technical expert (engineer, thermographer, roofing or mold expert) you reference or collaborate with.
Private or Shared
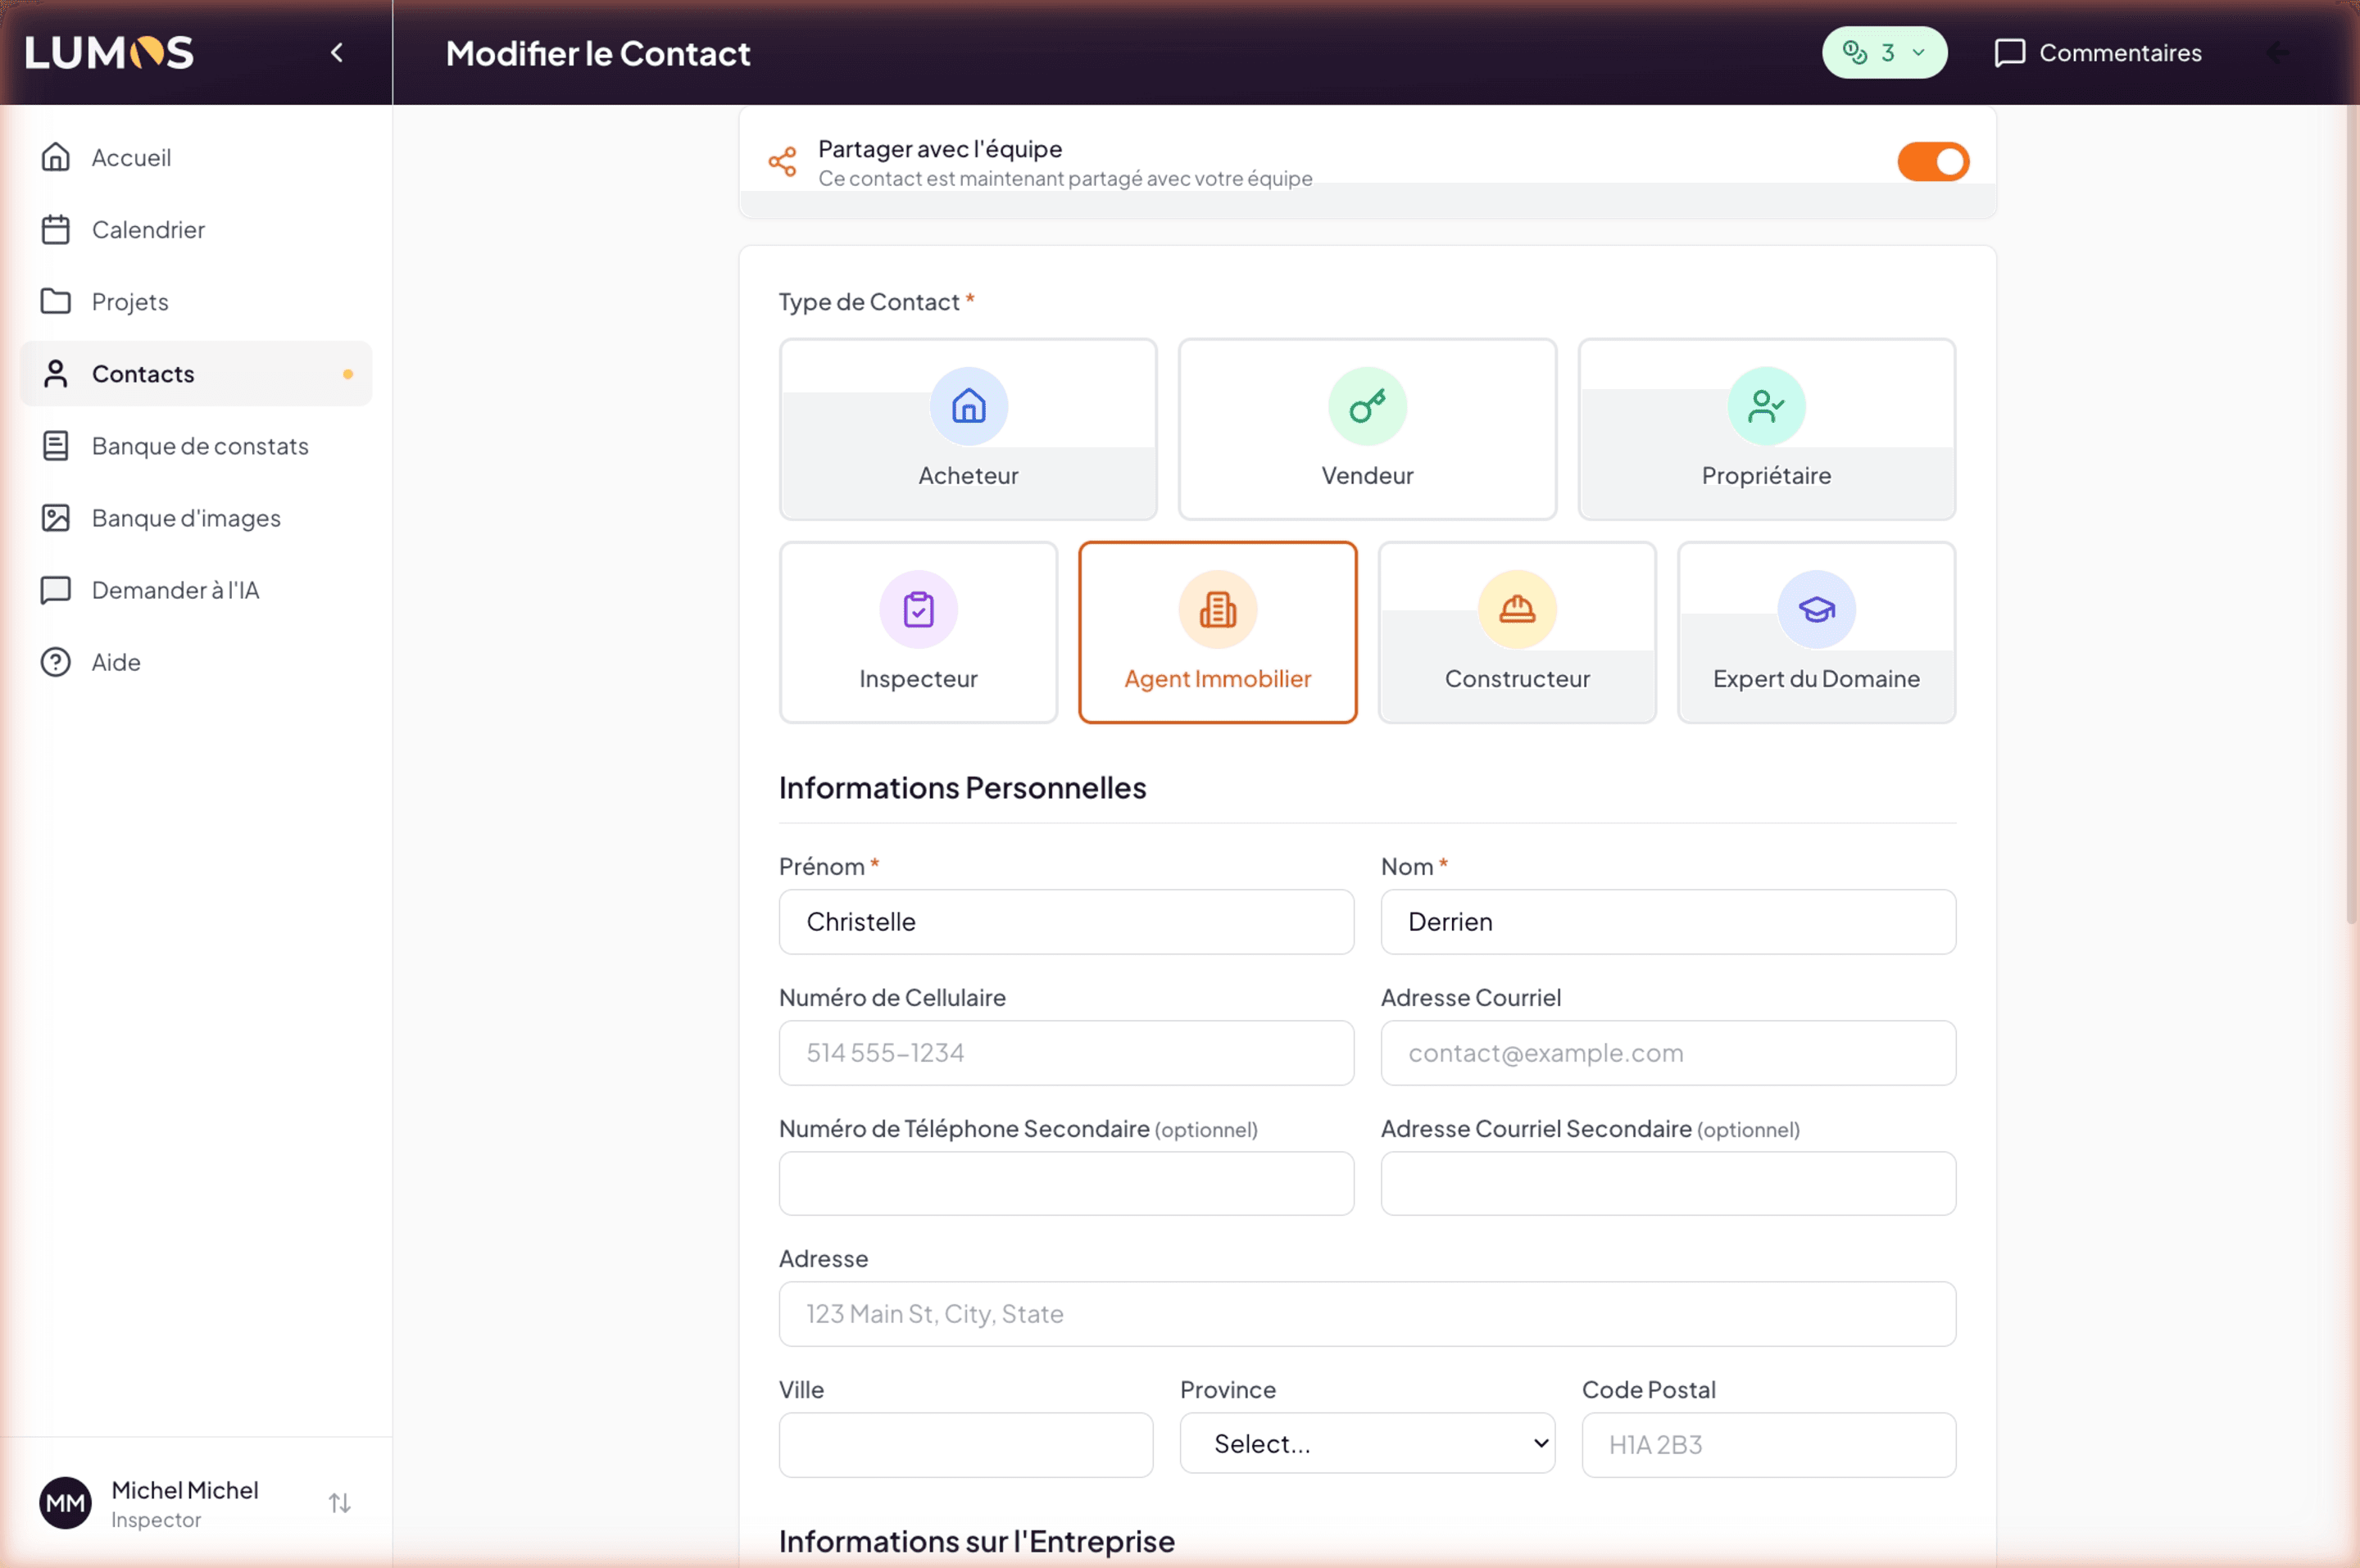
A contact is created Private by default: visible only in your address book. If you work in a team, you can Share it with other members so all inspectors under your account can access it.
This distinction is useful for separating client-specific contacts (Private) from shared business partners (Shared: real estate agents, listing agents, experts).
Create a contact
Click New Contact at the top right. Creation opens in a dedicated page (/contacts/new), not a modal — the originating page stays in the background.
Choose the type
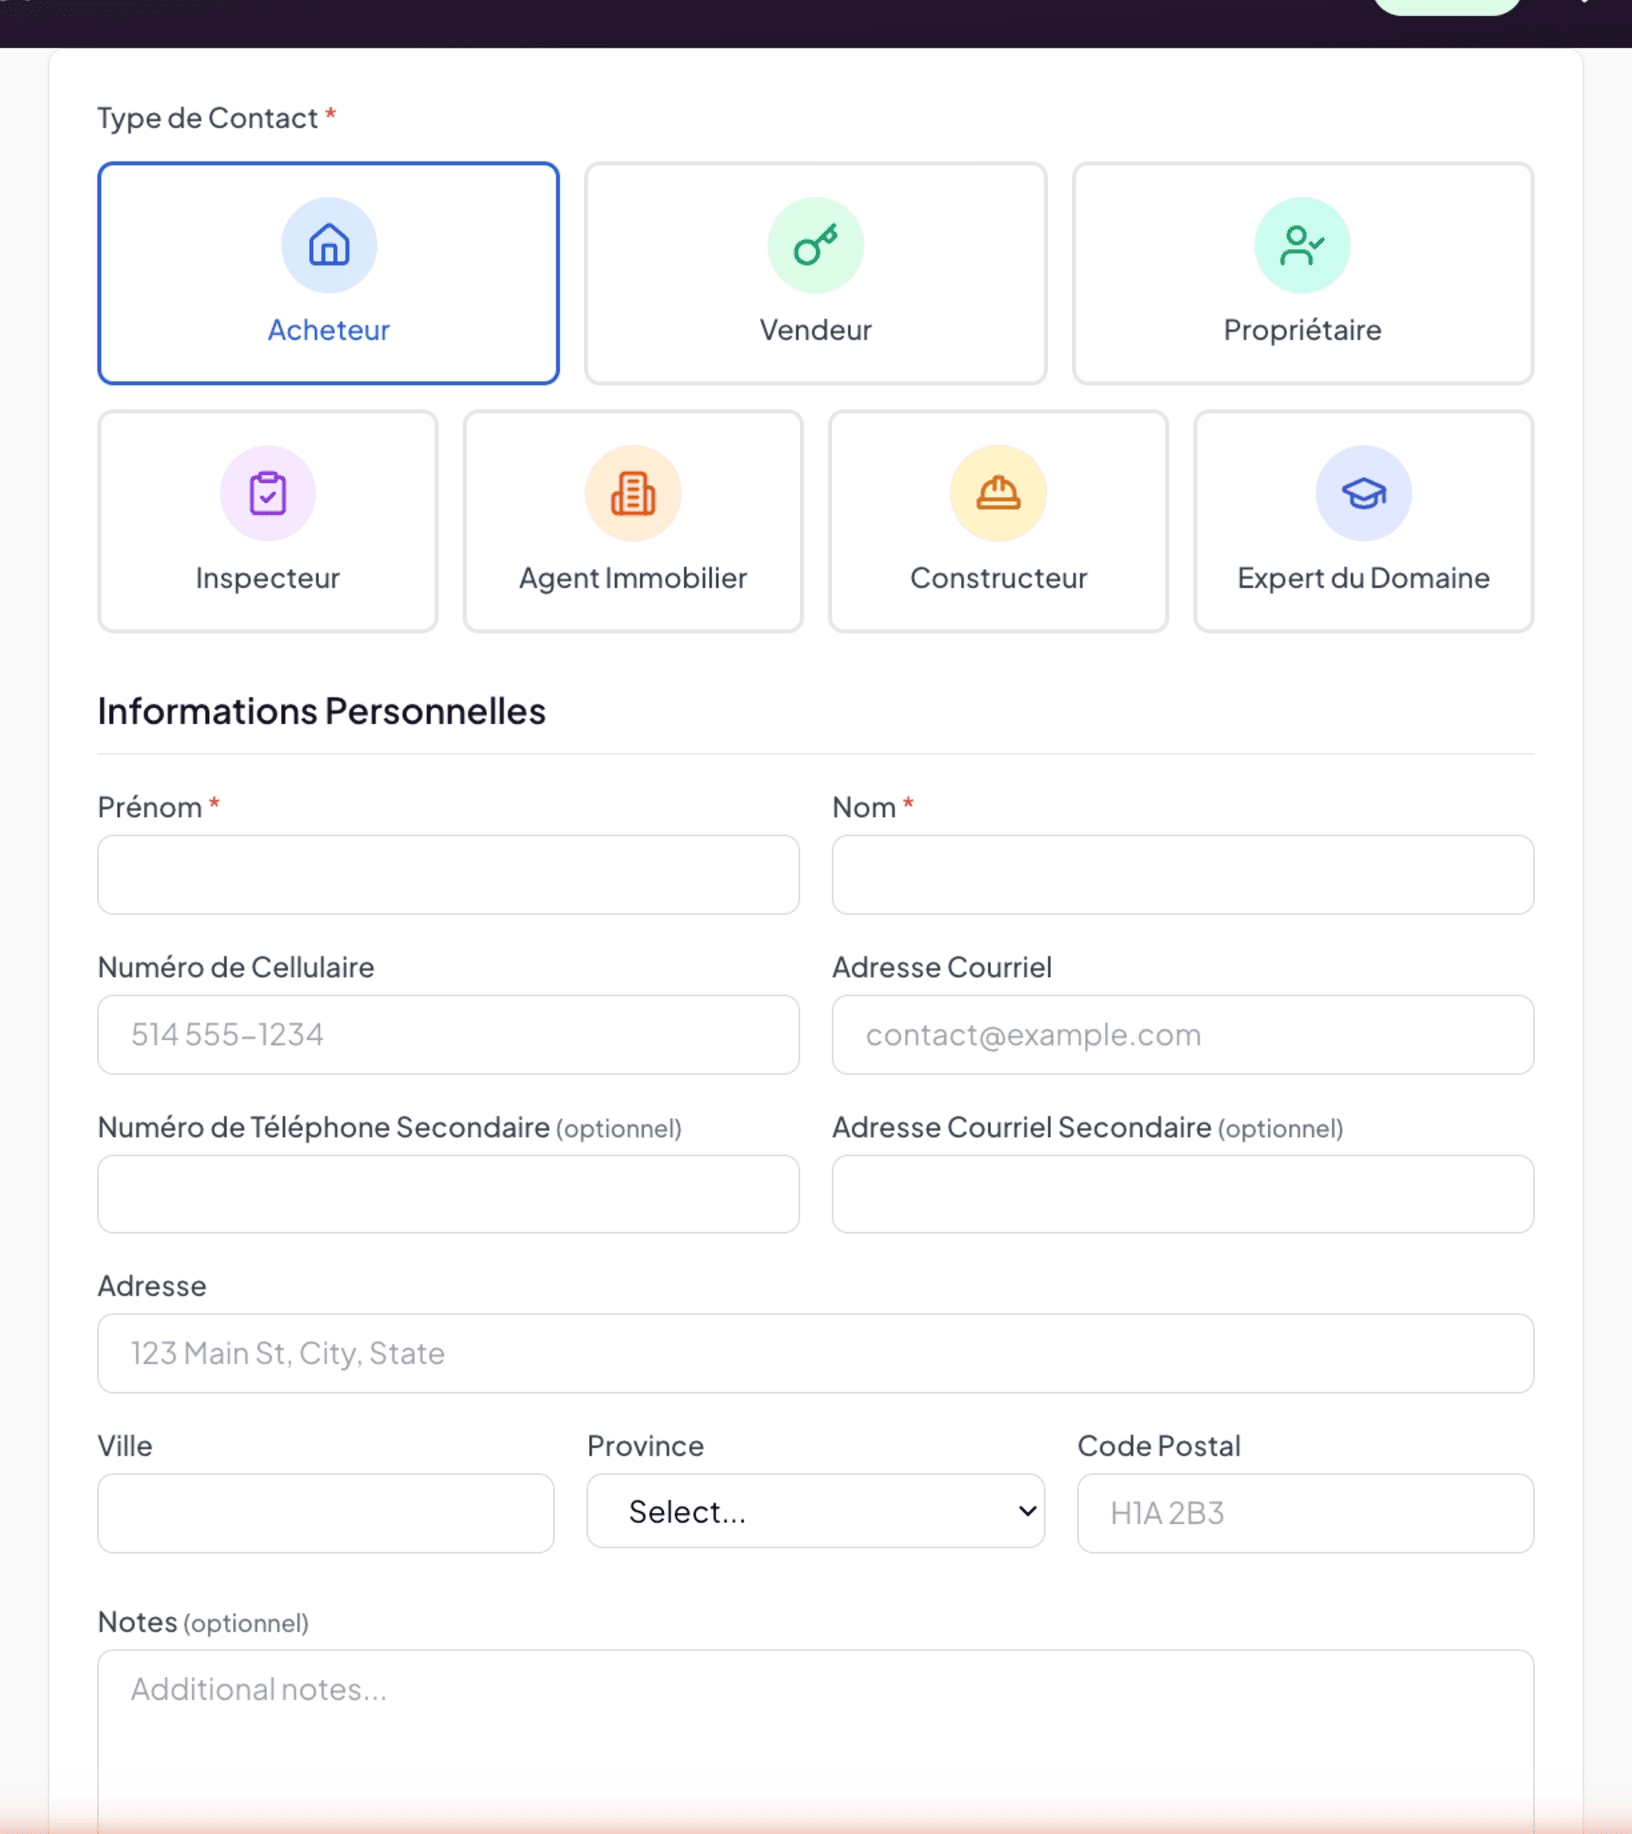
Seven cards let you choose the type. Buyer is selected by default.
Personal information
Required fields: First name and Last name. All other fields are optional but recommended for the quality of your reports and ease of contact:
- Mobile number (placeholder 514 555-1234)
- Email address (placeholder contact@example.com)
- Secondary phone number
- Secondary email address
- Address, City, Province (all 13 Canadian provinces and territories available), Postal Code
- Notes — free text for context details
Note: the Contacts province list covers all of Canada, unlike your business profile which is limited to QC, ON, BC, and AB. You can therefore save a contact anywhere in the country.
Edit a contact
From the list or grid view, click the pencil at the top right of a card. The contact opens in edit mode. Changes are saved via the Save button.
How contacts are used
A contact created in the address book is selectable from the New Project form (Client field). You can also associate multiple contacts to an inspection: client’s agent, seller, seller’s agent, and even custom roles via the People section of the inspection page.
Step-by-step
A Guidde video dedicated to the Contacts address book is in the works.
See also
- Create a project — where the contact is associated with the project
- Start an inspection with a quote — where other contacts (seller, agent) come into play