Start an inspection with a quote
This is the recommended path to add an inspection to a project. It secures the contractual relationship with your client before the visit: you generate a quote and your association’s service agreement, then send them for signature in a single email; the client signs both online, in their client portal.
At generation, the inspection is created in the project and appears with its status.
Two moments. Generate creates the documents as drafts in the Document Center — nothing is sent. Send for signature, in the Center, sends the email (no attachment) and opens the signature in the portal. See Chapter 10 — Contracts and agreements for the documents’ details.
Start the flow
From the project detail, the Quick Actions panel on the right shows the + New Inspection button with a dropdown arrow. Click the arrow to open the menu, then select Prepare a quote.
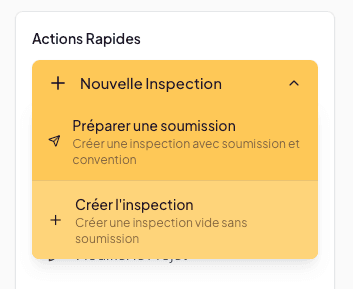
The option is described in the menu as “Create an inspection with a quote and agreement.”
Step 1 — Choose a template
A first modal Choose a template asks which inspection model to use. Lumos shows all available templates, classified into two categories:
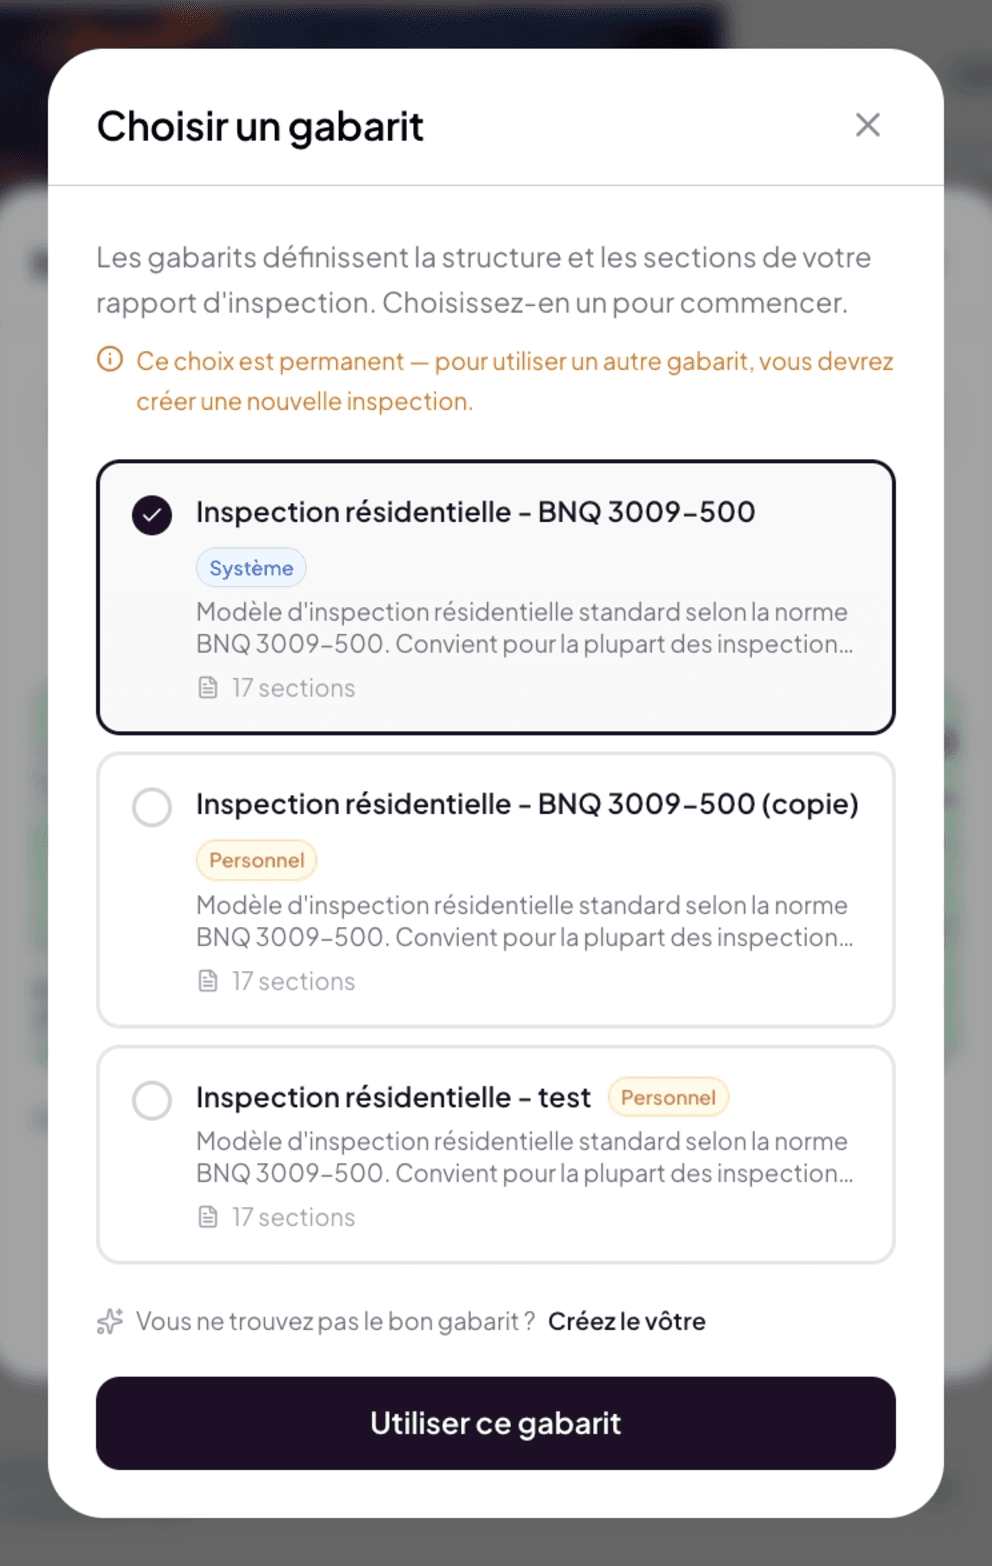
- System — templates provided by Lumos, for example Residential Inspection - BNQ 3009-500 (17 sections).
- Personal — templates you have created for specific needs (adapted residential, commercial, etc.).
Each card shows the name, a short description, and the number of sections in the report.
The template choice is permanent for this inspection. To use another template, you will have to create a new inspection. Confirm your choice before validating.
If no existing template matches your need, the “Create your own” link takes you to the template editor (see Customizing report templates).
Click Use this template to move to the next step.
Step 2 — Generate the documents
The Generate documents window opens: “Tick the documents to create for this mandate. They will be drafts in the Center; you will then choose what to send and what to have signed.”
Date and time
- Inspection date — pre-filled with the project’s desired date; confirm or correct.
- Inspection time — to enter.
These two pieces of information are required to move to the next step.
Quote
Ticked by default. Where you set the inspection price:
- Inspection type — dropdown that pulls from your configured services.
- Price ($).
- Add an item — for multi-service inspections (for example main inspection + optional thermographic inspection).
Lumos calculates the subtotal and total automatically.
Service agreement
Ticked by default. A menu lets you choose your association’s agreement among those available for your profile (Business Configuration > Service Agreements):
- APCHQ Service Agreement (and its non-REIBH edition) — if your APCHQ member number is filled in.
- AIBQ Service Agreement (and its BNQ edition) — if you have the AIBQ affiliation.
The agreement’s options show underneath: Divided co-ownership (condo) adds Annex B; Business adds Annex E; Include the attestation of completion prepares the attestation page; Include the thermographic annex adds it to the agreement.
Inspection prerequisites (AIBQ, APCHQ)
For an AIBQ (BNQ standard) or APCHQ agreement, the Inspection prerequisites section generates the prerequisites form — the AIBQ’s own, or Lumos’s generic form for APCHQ — which the client will also sign in their portal (with the “Your preparations” step).
Standard of practice
Generates the PDF of the association’s professional standard of practice, to make available to the client in their portal.
Generate
The Generate N documents button creates everything as drafts and closes the window on a summary: “Drafts in the Document Center. Make them available or send them for signature from the By inspection view.” Nothing is sent yet.
Step 3 — Send for signature
Open the Document Center tab (the inspection card’s pill leads there). Under ② Send and signatures, the drafts are already ticked; click Send for signature (N). The email opens, built on your quote email template (Business Configuration > Quote & Invoice) with the variables filled in; you can edit it before sending.
The client receives one email, with no attachment, with the Open my client portal button. In their portal, they sign the quote, the agreement and the prerequisites, in any order; the standard of practice is available to read. For tracking details, see Quote tracking.
What happens at generation
The inspection is created in the project as soon as you generate, with:
- Its inspection number derived from the project number (for example
INS-2026-0504-111-1). - Its initial status In progress.
- Its draft documents in the Center: quote, agreement, prerequisites, standard as ticked.
- The details entered (date, time, items, services).
You can open the inspection to prepare for field capture (general information, descriptions, report sections).
Step-by-step
A Guidde video dedicated to the full flow (template → quote → send) is in the works.
See also
- Start an inspection without a quote — the quick alternative
- Quote tracking — what happens after the send
- Business Configuration > Service Agreements — where your agreement templates are configured
- Business Configuration > Quote & Invoice — where your email templates are configured
- Using variables in text editors — details on available variables