Inspection elements
Inspection elements are the fields the inspector fills out in a sub-section: text description, method used, observed materials, measurements, dates. In the editor, they appear as the inspector will see them and edit directly in place. This page lists the 6 available types, shows how to configure them, and explains the Automatic finding mechanism on options.
Editing an element in place
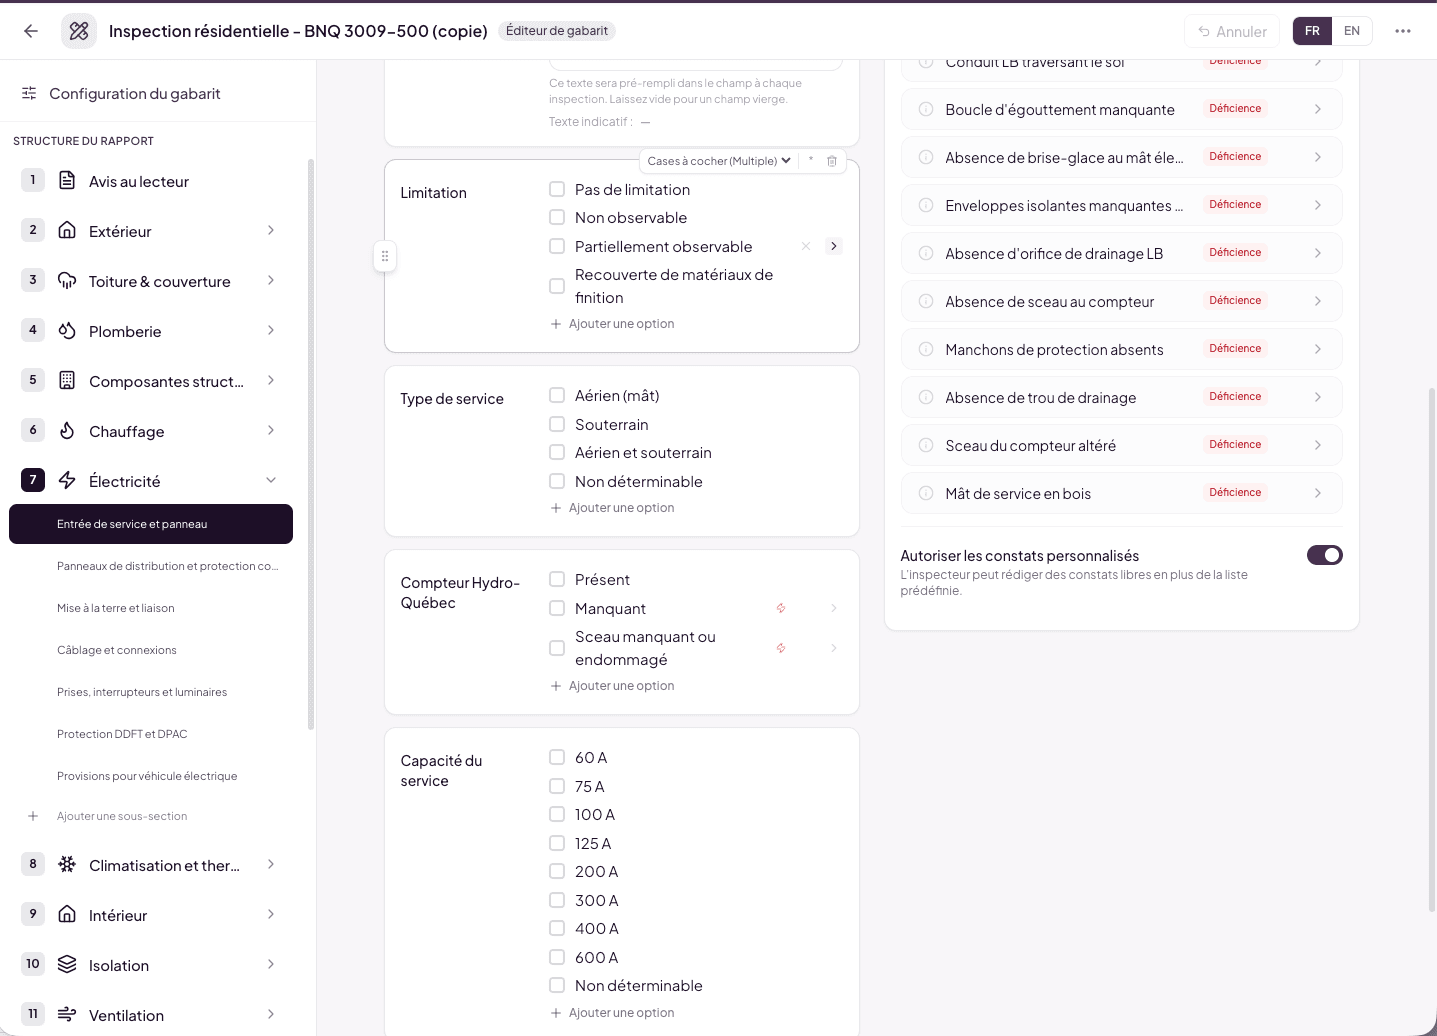
Each element is a card in the sub-section’s main column. Three gestures are enough:
- Click the label (for example “Limitation”) to rename it in place.
- Hover the card: a toolbar appears at the top right with the type selector, the Required asterisk (the inspector will have to fill this field), and the trash; a drag handle appears on the left edge to reorder the element by drag and drop.
- Click an option (for option-based types) to rename it; the × deletes it, + Add an option creates one.
Adding an element
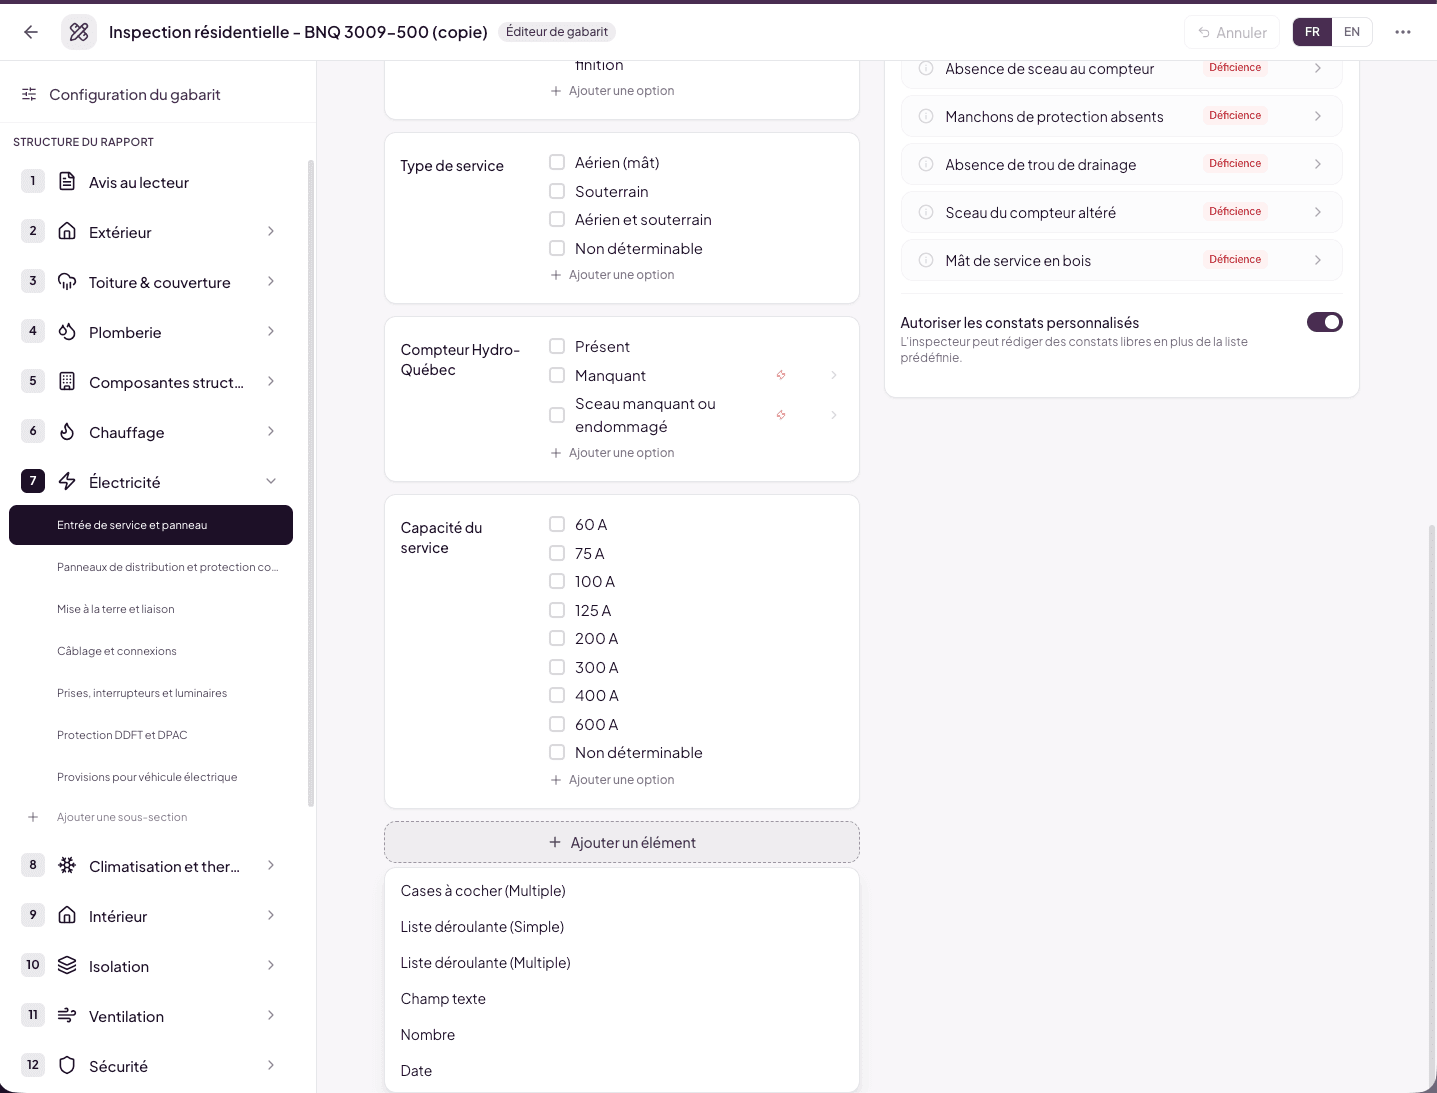
The + Add an element button (below the last element) opens the 6-type menu. The new element appears immediately in the form, ready to be named.
The 6 available types
1. Text field
Free field where the inspector types text — with formatting (bold, italic, links). The most flexible but also the most time-consuming to fill.
Typical use cases: Description, Inspection method, free notes.
Specificity: in the template editor, the text zone defines the pre-filled value. “This text will be pre-filled in the field for every inspection. Leave empty for a blank field.” You can also set a placeholder shown when the field is empty.
2. Number
Numeric field. Use cases: construction year, measurements, number of floors. You can set its placeholder.
3. Date
Date picker. Use cases: last chimney sweep date, equipment installation date.
4. Dropdown (Single)
Single-choice list. The inspector selects one value among the defined options.
Use cases: Main material (Poured concrete / Concrete blocks / Wood…), General condition (Excellent / Good / Fair / Poor).
5. Dropdown (Multiple)
Multi-choice list in a dropdown. Use cases: Tools used, Codes consulted.
6. Checkboxes (Multiple)
Checkboxes all visible at once (no dropdown). The inspector checks as many as apply.
Use cases: Limitations encountered (Furniture / Blocked access / Weather…), observed secondary materials.
Configuring options (types 4, 5, 6)
Options display exactly as in the inspection form. For each option:
- Click the label to rename it.
- On hover: × to delete, chevron > to open its advanced panel.
- + Add an option at the bottom of the list.
The advanced panel — Automatic finding
An option’s chevron opens its advanced panel with the Automatic finding toggle: “When the inspector picks this option, a finding is automatically created in the report. Link a narrative from the bank: its type and severity are used.”
An option with an automatic finding carries the orange lightning bolt ⚡ — spottable at a glance in the form. The mechanism is identical to the Inspection status one, see RT.6.
Example — a Limitation element of type Checkboxes
- Option Partially observable — automatic finding linked to a Limitation narrative: “The component was partially observable at the time of inspection due to furniture or insulation. Hidden elements could not be evaluated.”
- Option Furniture — a different Limitation narrative: “Furniture obstructed access to some areas. A complete inspection was not possible.”
When the inspector checks Furniture in the field, the matching finding automatically appears in the sub-section. No need to search the Bank or retype the narrative.
Reordering and deleting
- Reorder: grab the handle on the card’s left edge (visible on hover) and drag the element to its new position.
- Delete: trash in the hover toolbar. The header’s Undo button recovers an accidental deletion.
Best practices
- Favor structured types (lists, checkboxes) over free text for standard elements. Faster to fill, more consistent, and compatible with Automatic finding.
- Reserve Text fields for truly narrative passages (fine description, specific context) — and pre-fill them when a standard starting text exists.
- Systematically link your options to automatic findings when the mapping is stable (“If the inspector observes X, the finding to insert is always Y”). The ⚡ marks show you where automations are already in place.
- Test your elements by creating a test inspection after modifying the template. You’ll immediately see whether labels are clear and automatic findings insert correctly.
See also
- RT.6 Inspection status and automatic narratives
- RT.8 Narrative configuration
- Chapter 8 — The Narrative Bank — where the narratives referenced by automatic findings are stored