Send the report to the client
This page walks you through sharing the interactive report of an inspection with your client. Lumos automatically recovers links you already generated, lets you email several recipients at once, and lets you choose which documents are included in the client report.
Start the sharing
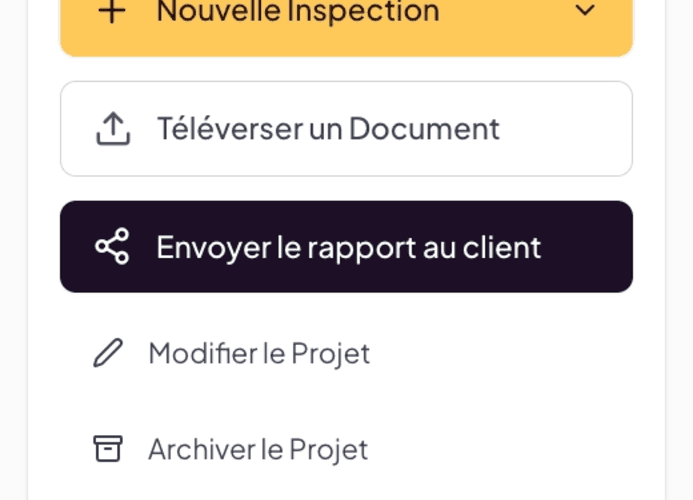
From a project’s record, the Quick Actions panel on the right shows the Send report to client button. Click it. What opens next depends on the state of your reports:
- A link was already generated for the inspection — Lumos recovers it and opens the share modal directly with the existing link and access code. No need to regenerate anything: the link already sent to your client stays valid.
- Several inspections in the project — a chooser modal lists each inspection (see below).
- No link generated yet — Lumos offers to create the client report (pick the inspection and the documents to include), then click Generate report link.
Choosing the report to share (multiple inspections)
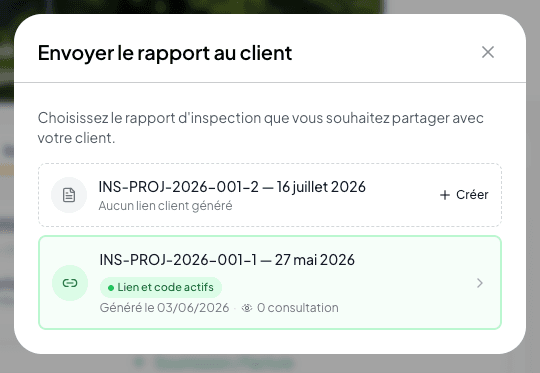
If the project contains several inspections, the Send report to client modal lists each of them:
- Inspections with an active client link stand out in green with the Active link and code badge and the generation date.
- Inspections without a link show No client link generated and a Create button.
Click an inspection with an active link to reopen its share modal, or Create to generate a first link.
The Share Interactive Report modal
The share modal has two tabs: Send by email and Copy and share. When you reopen an existing report, a banner reminds you: “A report was already generated for this inspection. Here are its current link and access code — you can resend them by email or regenerate a new report if needed.”
Tab 1 — Send by email
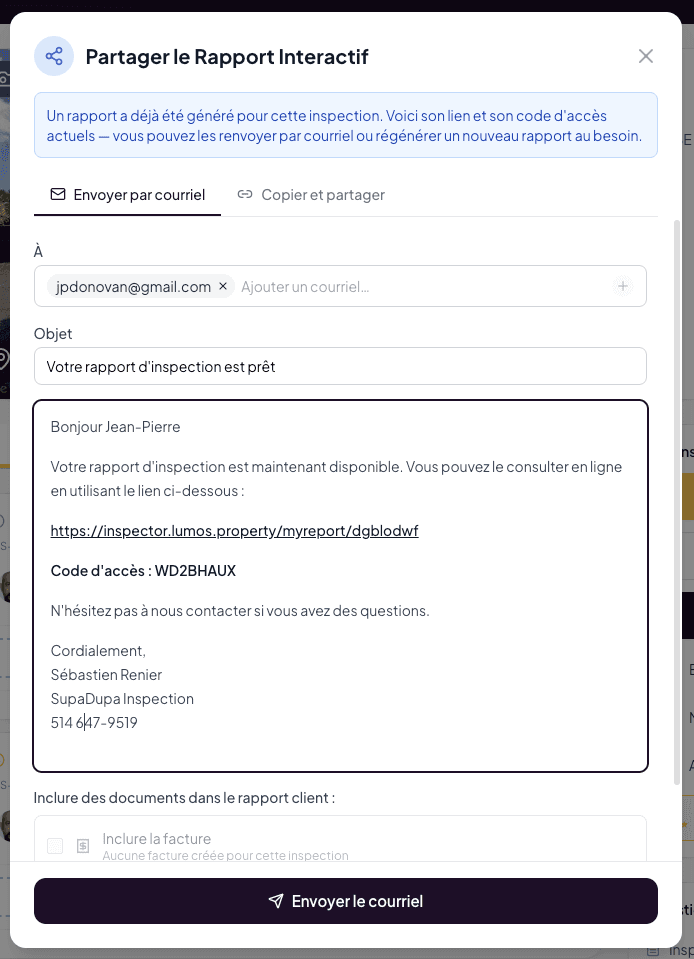
Lumos pre-fills a complete email:
- To field — the main client and every co-requestant on the file are added automatically as chips. Remove a recipient with the X, or add an address manually (type it, then press Enter). A single email is sent to all recipients.
- Subject field — the email subject.
- Email body pre-filled: greeting, link in the format
inspector.lumos.property/myreport/<slug>, access code, invitation to ask questions, and a signature with your contact details. The text is editable before sending. - Include documents in the client report — the checklist under the message (see the next section).
The Send email button always stays visible at the bottom of the modal, even while the content scrolls.
Choosing the documents included in the client report
Under the email message, the Include documents in the client report: section lists what your client will see in their interactive report, in addition to the report itself:
- Include Invoice — the inspection’s invoice (checkbox disabled if no invoice exists).
- Include Service Agreement — the signed agreement (checkbox disabled if no agreement exists).
- Project documents — one checkbox per document uploaded to the project (seller’s declaration, previous reports, etc.).
Every checked or unchecked box is saved immediately: the client report updates without changing the link or the access code. You can therefore add the invoice after the fact — your client will see it the next time they open the same link.
After sending: the confirmation and the tracking
As soon as the email goes out, Lumos sends you a confirmation: who the report went to, the date and time, the inspection number, and a link to the project. You do not have to come back and check that the gesture landed. The confirmation is on by default and can be turned off in Settings → Notifications.
On a team account, the account owner can receive a copy of every confirmation, whoever sent the report. That is their own setting, in their own Settings → Notifications.
The full tracking then lives in the Document Center, By inspection view: an aubergine block under step ③ shows the send date, the recipient’s address, the open state, and who received a confirmation. The inspection card, on the project page, repeats the essentials on a single line. See Open tracking and post-delivery follow-up.
Tab 2 — Copy and share
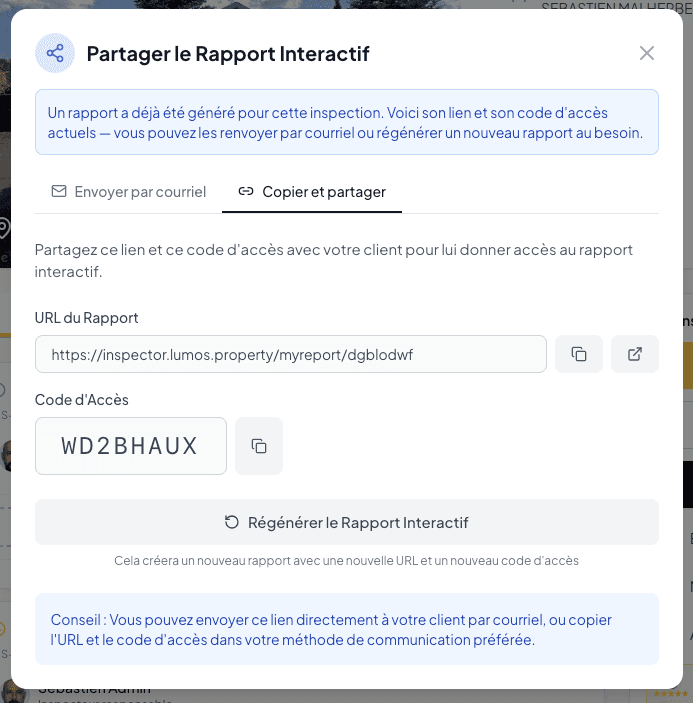
For cases where you prefer to use your own communication channel (personal email, secure messaging, in person). Lumos shows:
- The Report URL with a copy button.
- The access code with a copy button.
- The Regenerate Interactive Report button — creates a new report with a new URL and a new access code. Careful: the old link and code stop working.
Multiple inspections in the same project
If your project contains several inspections (for example an initial inspection and a re-inspection after work), each inspection has its own link and access code. The chooser modal shows the state of each at a glance — active link and generation date — and lets you share or create each link individually.
Step-by-step
A Guidde video dedicated to sending the report is in the works.
See also
- The interactive web report — what your client sees when they click the link
- The client experience — the secure access page and branding
- Open tracking and post-delivery follow-up — the send confirmation and the tracking block
- Notifications — turn the send confirmation on or off
- Business Configuration > Quote & Invoice — where the email template is configured