Template editor anatomy
The template editor is made of three zones: the header (global actions), the navigation on the left (report structure), and the editing area filling the rest of the screen. Before modifying content, take two minutes to get oriented.
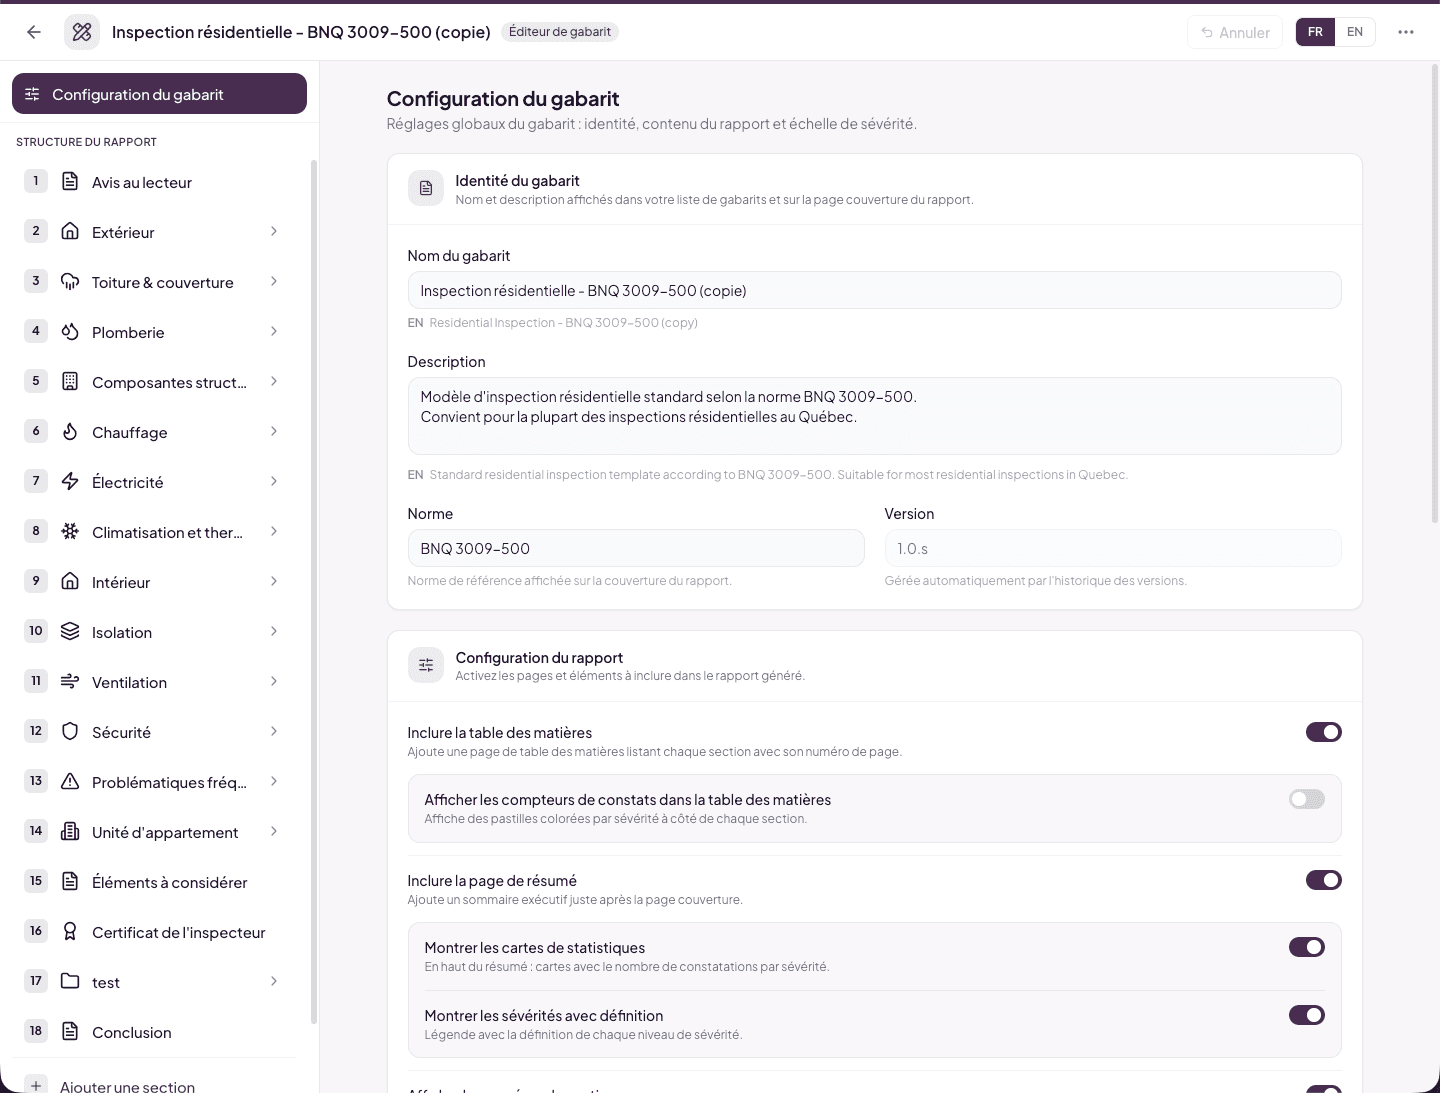
Getting in
From the Inspection templates tab, click the Edit icon (pencil) on one of your personal templates, or Duplicate to open a copy of a system template. On opening, the editor lands on the Template configuration page (global settings).
The header
The top bar is deliberately minimal — only permanently useful information stays visible:
- Back arrow (left) — return to the templates list.
- Template name + Template editor badge — the badge reminds you that you’re in the editor, not in an inspection.
- Save indicator — the editor saves automatically, about two seconds after your last change. The indicator alternates between “Saving…” and “Saved”. There is no Save button.
- Undo — reverts the last change. Clickable multiple times (about fifteen steps back), shortcut Cmd+Z / Ctrl+Z. The button is grayed out when there is nothing to undo.
- FR / EN switch — the editing language (see below).
- ⋯ menu — the less frequent actions, grouped.
The ⋯ menu
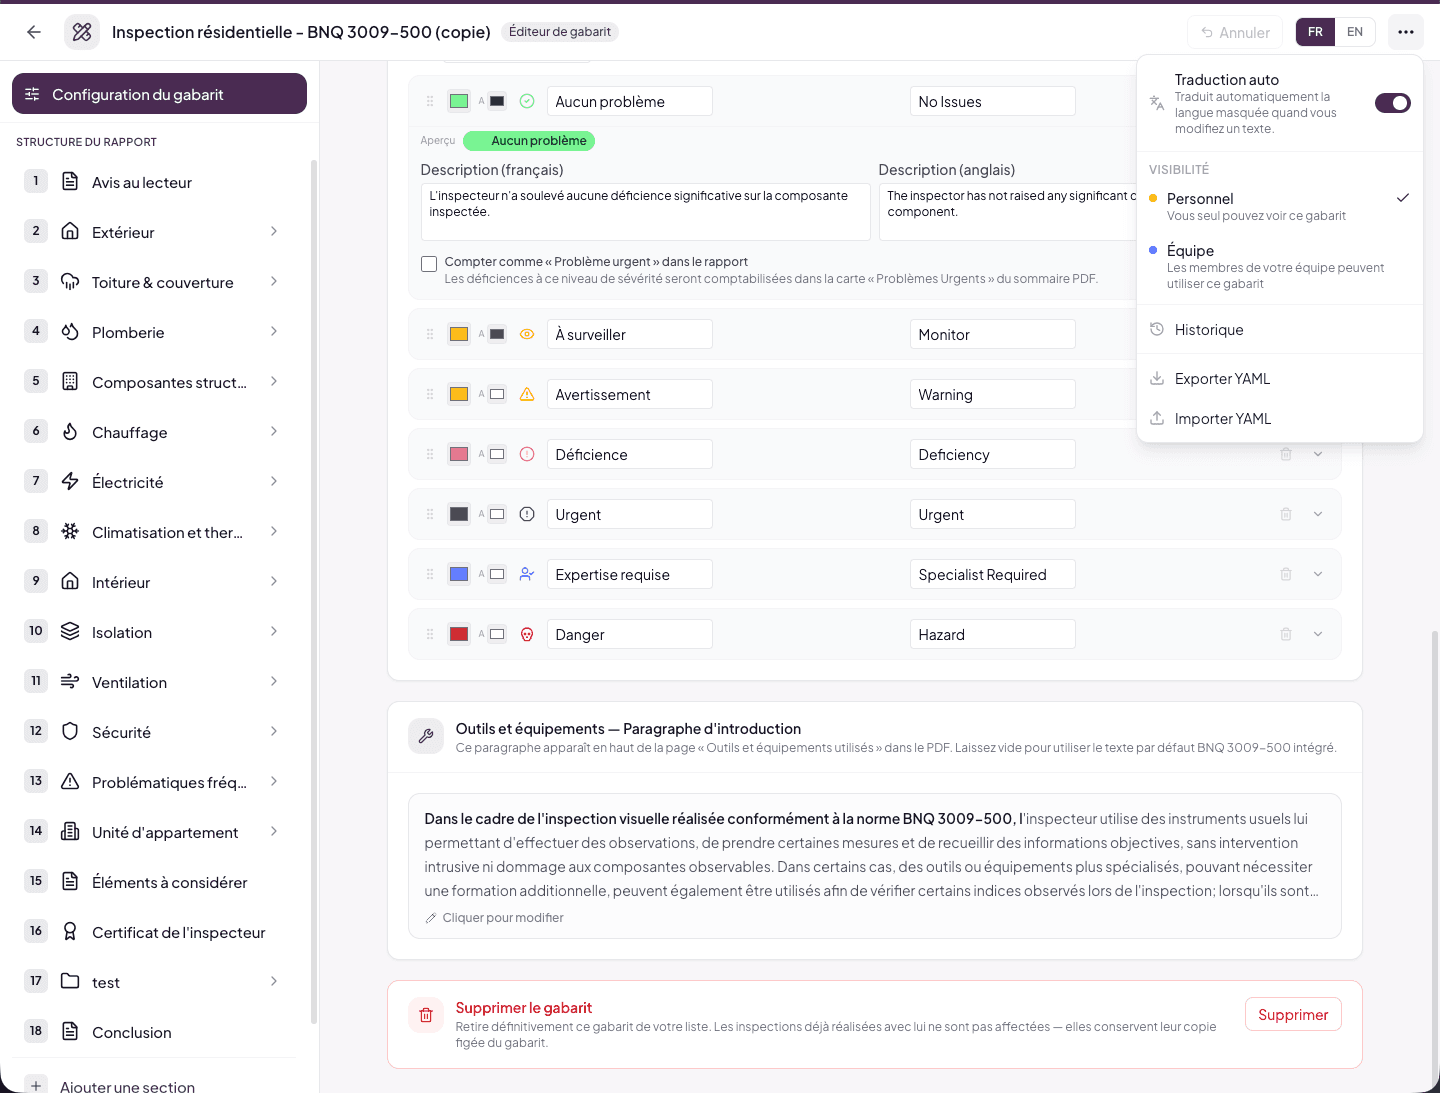
- Auto-translate (toggle) — when on, every text you modify is automatically translated into the hidden language in the background. You write in English, French follows (and vice-versa). On by default — turn it off only if you prefer writing both languages yourself.
- Visibility — Personal (only you can see this template, the default) or Team (your team members can use this template for their inspections — relevant if you have a master account with inspector sub-accounts).
- History — the list of your template’s snapshots. Lumos automatically creates one snapshot per day of modification; you can create one manually before a big overhaul, and restore an earlier state when needed. It’s your safety net beyond the Undo button.
One language at a time
The editor displays the template in a single language — the one selected by the header’s FR / EN switch. All the titles, options and texts you see and edit are in that language.
The other language isn’t lost:
- With Auto-translate on, it’s filled in automatically while you type.
- Under the fields of settings pages, a discreet reminder (e.g. “FR · Inspection résidentielle…”) shows the other language’s value.
- Flip the FR / EN switch anytime to check or touch up the other version.
This design avoids doubled FR/EN fields everywhere and keeps the editor identical to the inspection form.
The navigation (left column)
The left column mirrors the exact structure of the report, in the order sections will appear:
- Template configuration (pinned at the top) — the global settings: identity, report configuration, severity levels (see RT.9 and RT.10).
- Report structure — the numbered list of sections. Each row shows the section’s number, icon and name. The chevron expands a section to show its sub-sections.
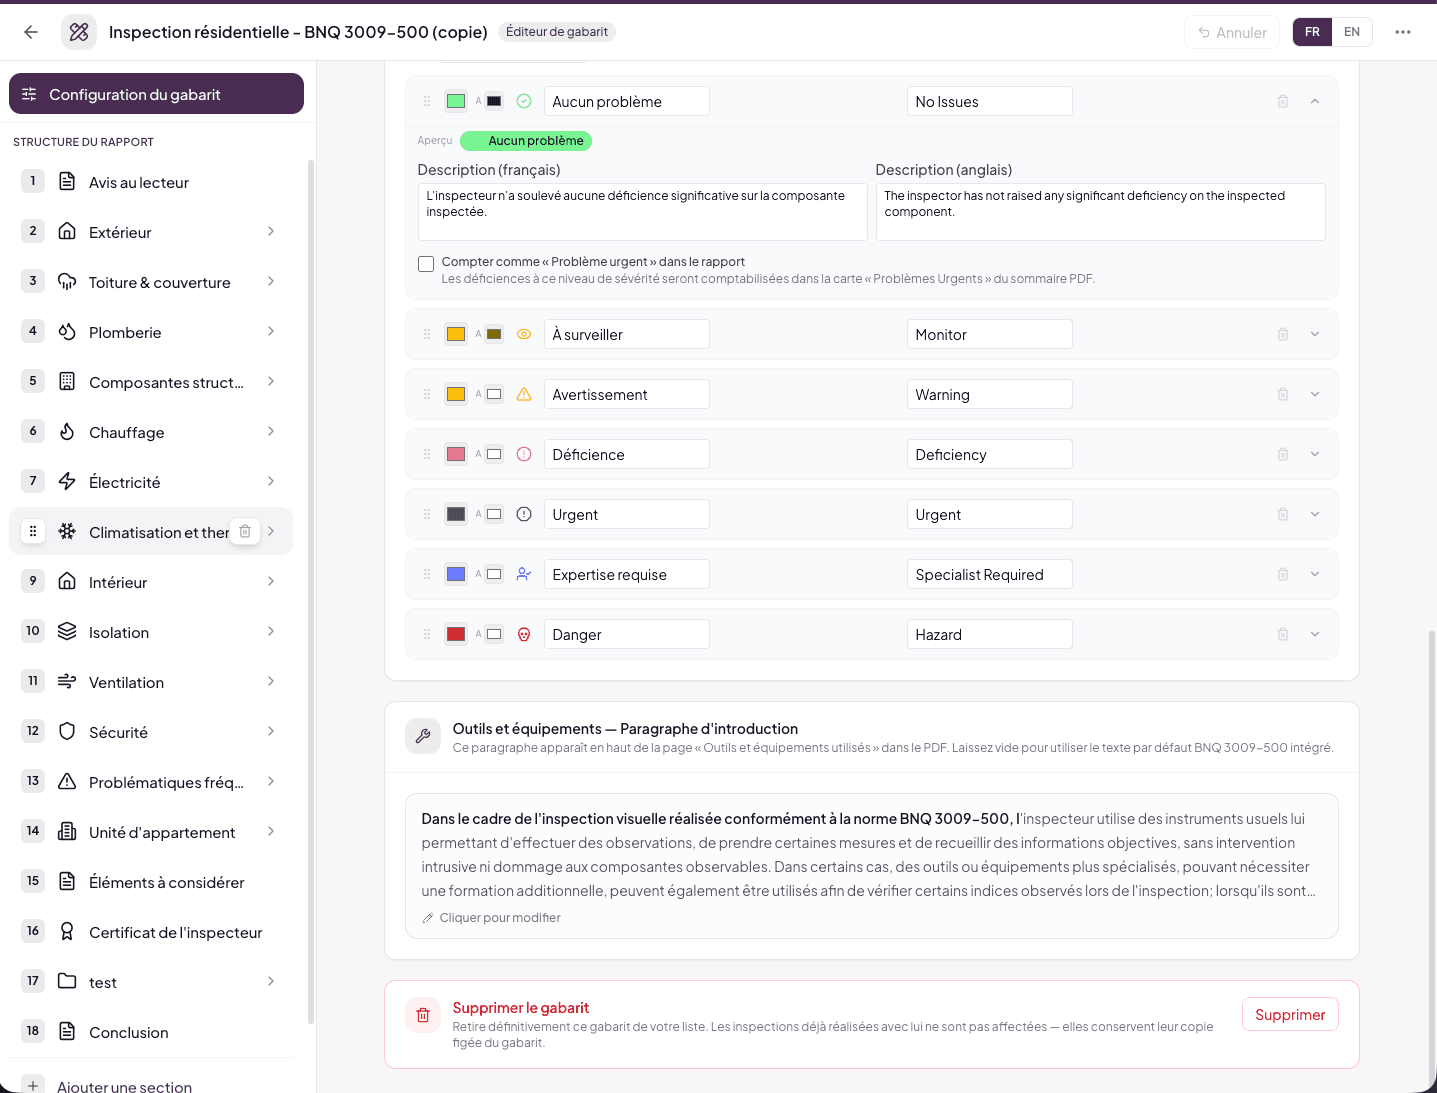
When hovering a row:
- the number turns into a drag handle (dots) on a white pill — grab it to reorder by drag and drop;
- a trash icon appears in a floating pill on the right — to delete the section or sub-section.
Clicking a section opens its settings page (icon, title, options — see RT.3). Clicking a sub-section opens its editing form (see RT.5). At the bottom of the list: + Add a section and Add a text block (see RT.3 and RT.4).
The editing area
The large area on the right shows whatever you selected in the navigation. For a sub-section, it’s a faithful replica of the inspection form: Inspection status card, elements to fill, Observations & findings list. You edit directly on it:
- Click a title or label to modify it in place.
- Hover an element to reveal its tools (type, required, delete) and its drag handle.
- Click a narrative to read its full text.
Every page and setting carries its own contextual help line — the editor documents itself as you go.
Save, undo, history — the safety model
Three levels of protection against mistakes:
- Undo (header, Cmd+Z) — for recent changes, up to about fifteen steps.
- History (⋯ menu) — automatic daily snapshots + manual snapshots, restorable.
- Per-inspection snapshot — inspections already created keep their frozen copy of the template, whatever you do in the editor (see RT.0).
Before a major overhaul (deleting entire sections, restructuring), create a manual snapshot via ⋯ > History. You’ll be able to roll back even days later.