The inspection editor — overview
The inspection editor is the nerve center of Lumos. This is where you turn your field observations into a BNQ-compliant report deliverable to the client. Everything goes through this screen: photos, narratives, building sections, compliance audit, PDF preview, finalization.
This page introduces the editor’s structure. The following pages of the chapter detail each zone and feature.
How to access it
From a project’s record, click the inspection you want to open. The editor opens in full screen. The URL takes the form /projects/{project}/inspections/{inspection}/....
Three main zones
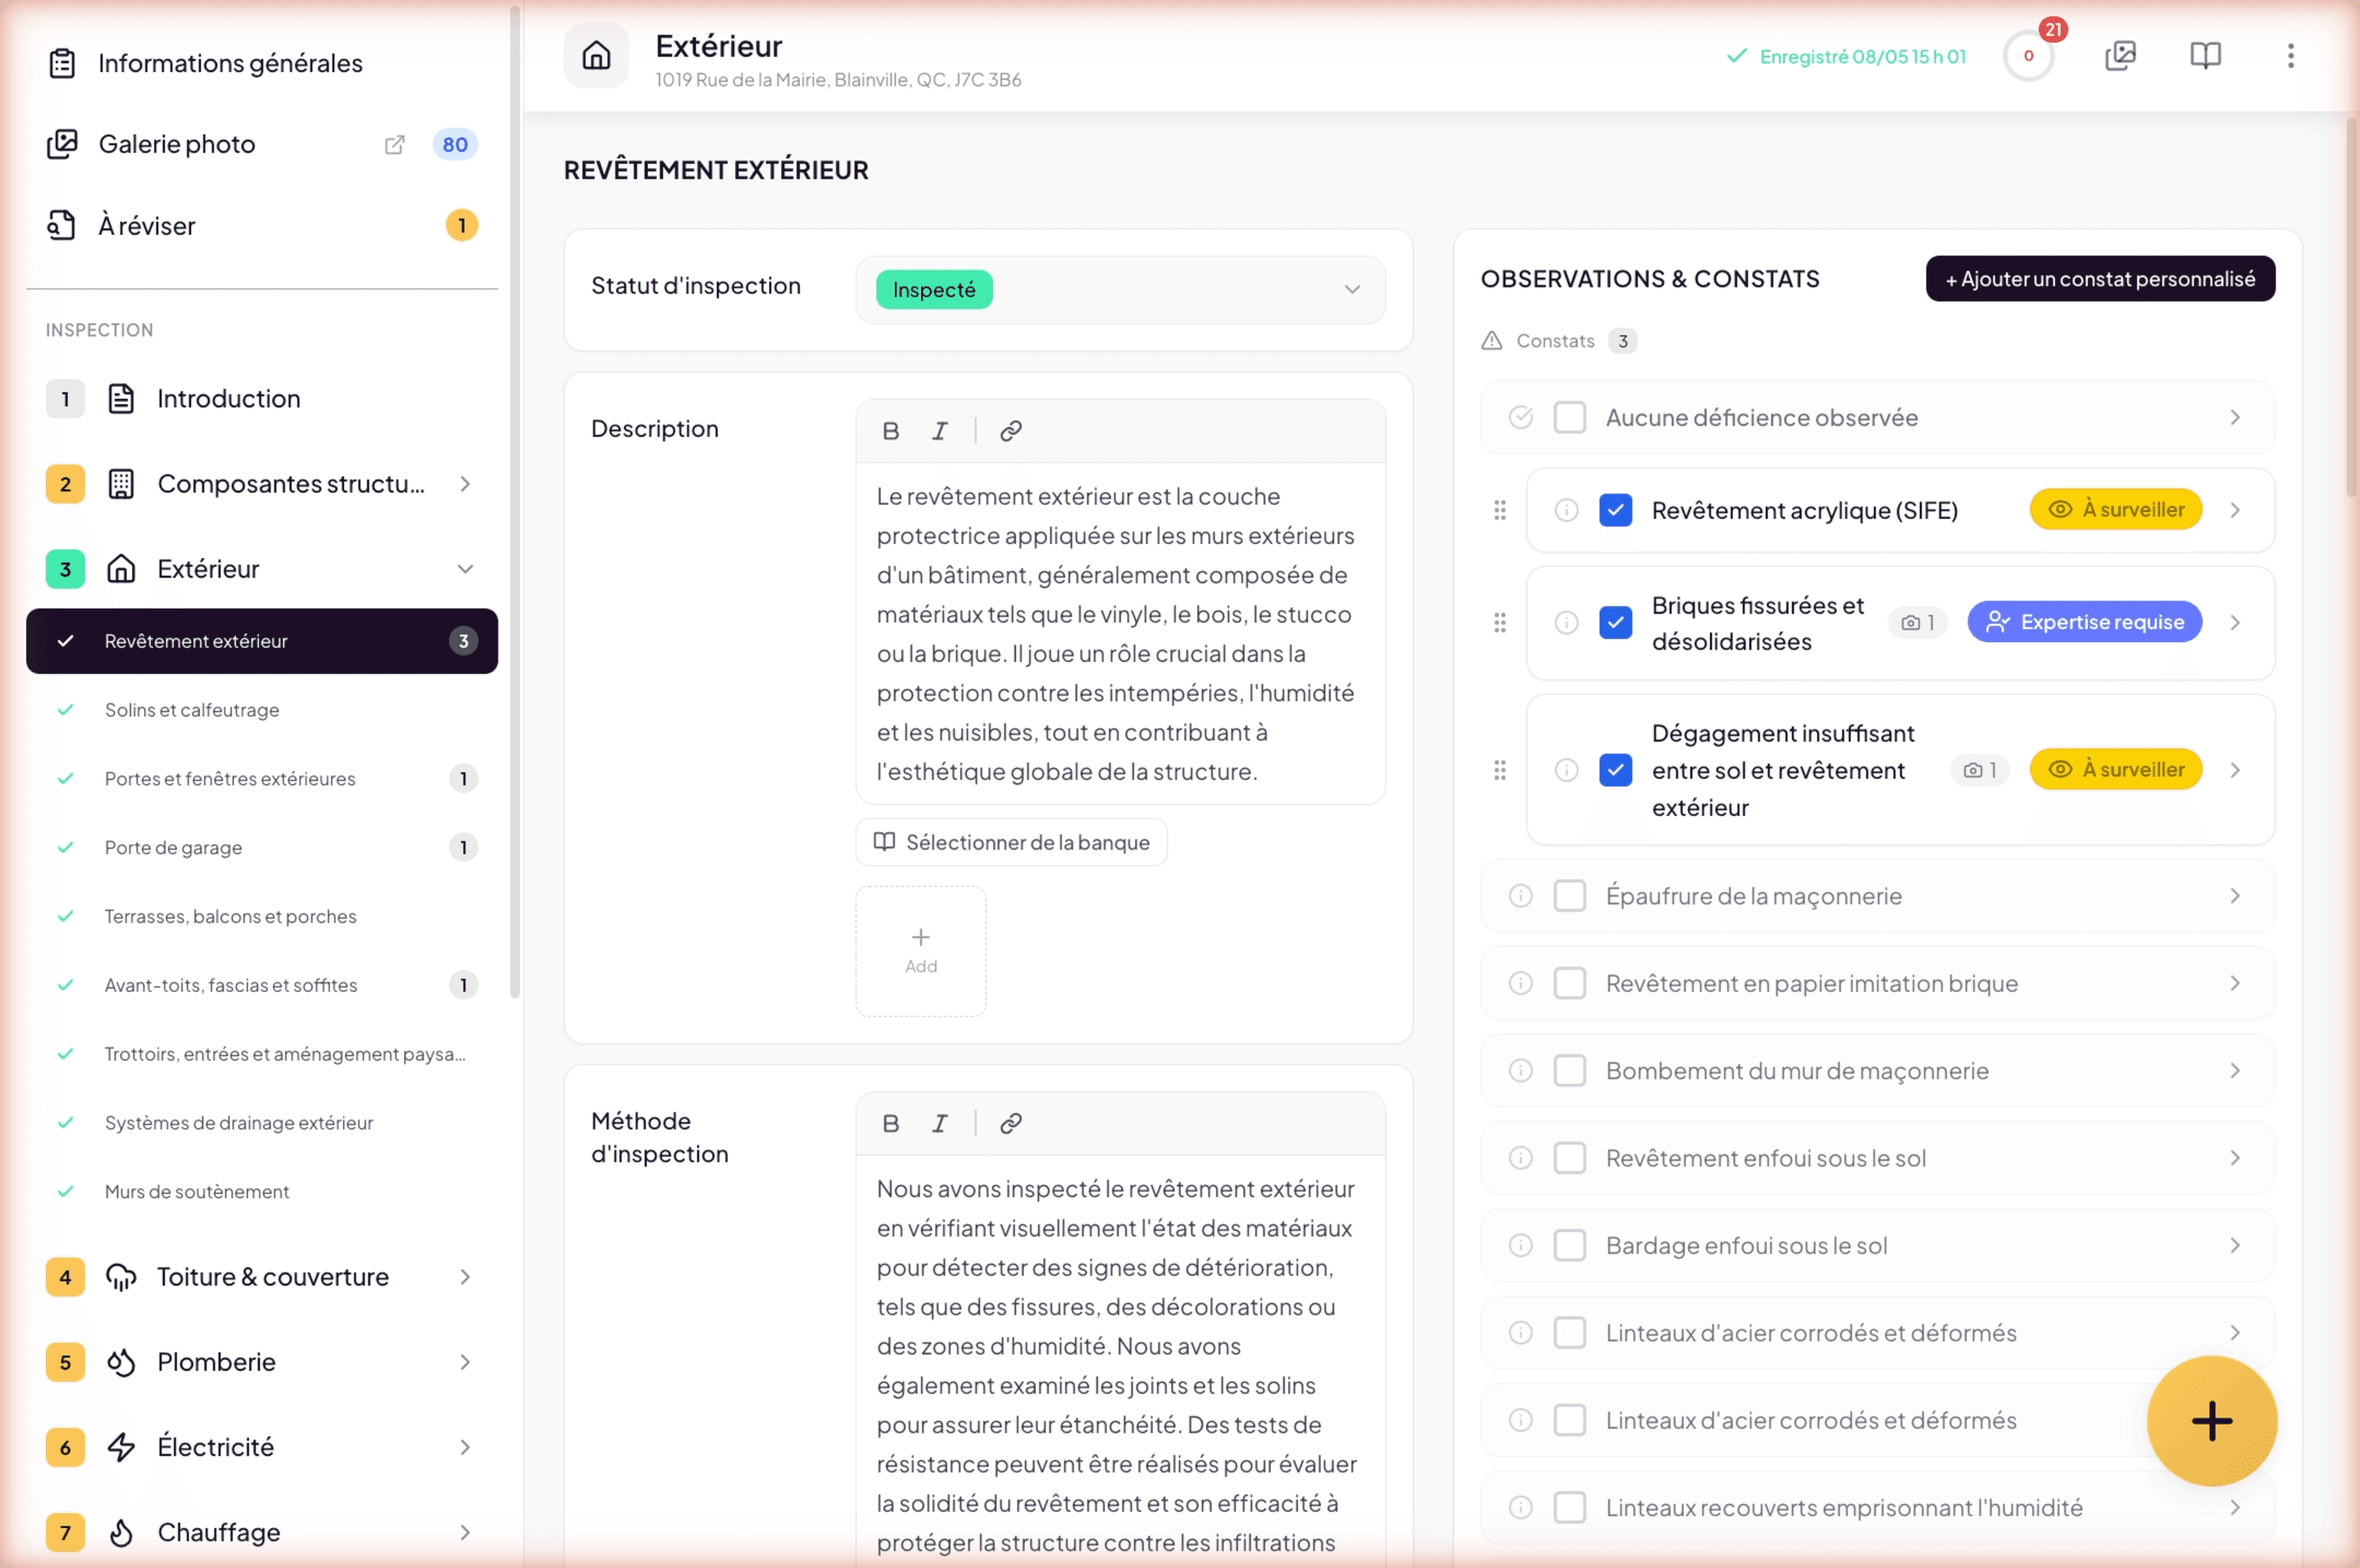
The editor splits into three permanent zones.
The left sidebar
This is your table of contents. It lists, in order:
- General Information — the inspection’s identity card (property, date, services, tools, people).
- Photo Gallery — all photos attached to the inspection. See The photo gallery.
- To Review — captures from Lumos Capture or via the floating button, awaiting classification. See To Review.
- A numbered list of building sections and Document-type subsections (Reader’s Notice, Items to Consider, Inspector’s Certificate, Conclusion). All of it comes from the template chosen at inspection creation.
The sidebar is collapsible via the menu button at the top left of the header, to free up space for the workspace.
The header
The header at the top of the screen gathers global editor actions:
- Current page title and “Saved at HH:MM” indicator (saving is automatic, no button to press).
- BNQ compliance gauge — a progress circle that shows compliance percentage of your report against the standard. See The BNQ compliance gauge.
- Photo Gallery button (images icon) — toggles a side panel on the right with the gallery. See The images side panel.
- Narrative Bank button (book icon) — opens the narrative bank as an overlay. See Using the bank from the editor.
- 3-dot menu — access to previews, PDF settings, audit, finalization, archive, exit. See The 3-dot menu.
The central workspace
The zone changes based on the element selected in the sidebar. On General Information, two columns (Property on the left, Inspection on the right). On a building section, the tree of subsections and their narratives. On a Document-type subsection, a rich text editor.
The floating (+) button
A yellow floating button at the bottom right stays visible at all times. It serves for quick capture from anywhere in the editor. Any capture launched from this button lands in To Review. See The floating (+) button.
Auto-save
Lumos saves your work continuously. The “Saved at HH:MM” indicator in the header confirms the latest save. No need to press anything to keep your changes.
Logic: template locked by snapshot
When you create an inspection, Lumos takes a snapshot of the chosen template. The structure (sections, subsections, pre-filled content) stays frozen for that specific inspection, even if you later modify the template for your future inspections.
You can change or reset the template of an ongoing inspection, but the operation wipes all entered data (restorable for 90 days thanks to a safety snapshot). See Change or reset the template.