Navigating Lumos
This page introduces the overall layout of the Lumos interface on desktop browser. Once you have located the main elements, you can reach any feature in two clicks at most.
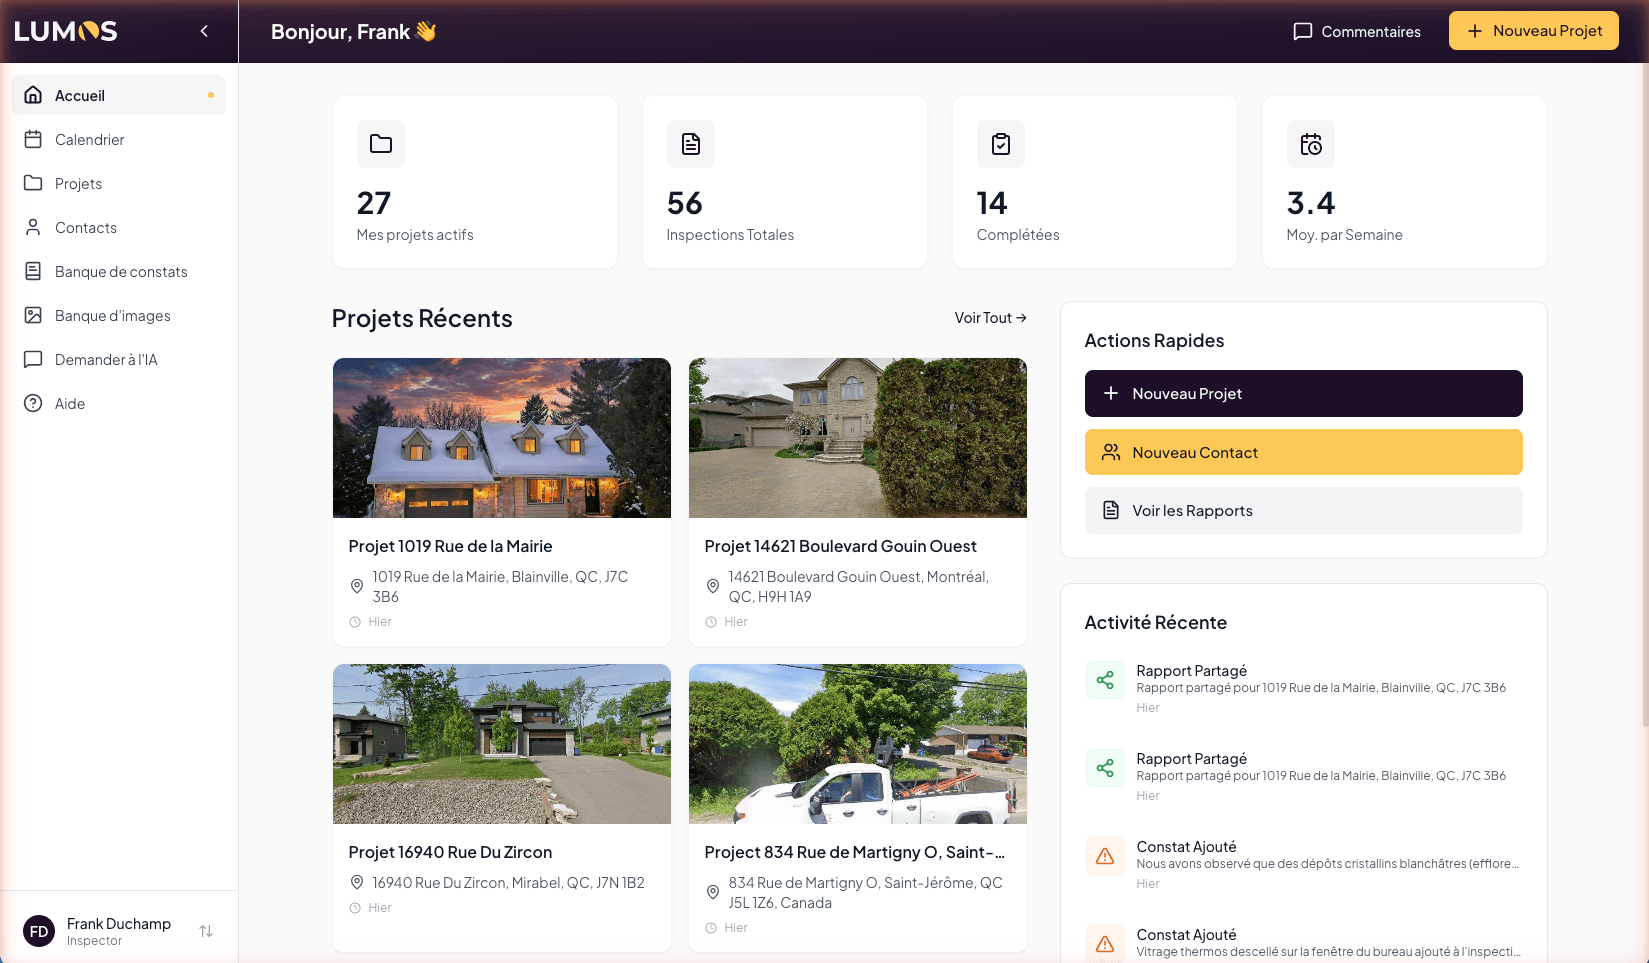
Lumos is built around three zones: the sidebar on the left to switch between workspaces, the header at the top for primary actions, and the workspace in the center for active content.
The sidebar
The sidebar, on the left of the screen, is your main entry point to the different Lumos workspaces. It stays visible at all times while you work.
From top to bottom:
- Home — your dashboard, with an overview of your activity and quick access to your recent projects.
- Calendar — the scheduled view of your upcoming inspections.
- Projects — the full list of your inspection projects, with search, filters, and archive options.
- Contacts — your address book (clients, real estate agents, partners).
- Narrative Bank — the collection of pre-formulated narratives you use in your reports.
- Image Bank — your library of reusable photos and diagrams.
- Ask AI — the intelligent assistant that helps you formulate narratives and structure reports.
- Help — access to this documentation and support resources.
To collapse the sidebar, click the arrow next to the Lumos logo at the top. The sidebar folds away and frees up space for your workspace. Click again to bring it back.
The bottom of the sidebar shows your profile (photo, name, role) and a sort button that leads to your settings.
The header
The header at the top of the workspace changes content based on the active page.
On the left, the page title (for example Hello, Frank on home, or Projects on the projects list).
On the right:
- A Comments button to send feedback about Lumos to our team.
- One or more primary actions tied to the page (for example New Project on home and on the Projects page).
The header acts as a contextual action zone: its content depends on the active screen.
The workspace
The workspace takes up the rest of the screen. This is where you read, create, and edit your inspections, narratives, and contacts.
Its structure varies by page:
- On Home, it splits into stat cards at the top, recent projects in the middle, and Quick Actions + Recent Activity panels on the right.
- On Projects, it shows a grid (or list) of project cards with a search bar and filters at the top.
- On an opened project, it displays building details, related inspections, documents, and an actions panel on the right.
On certain pages such as Projects, you can switch between grid view and list view using the icons at the top right of the workspace.
Reaching your settings
Your settings are not in the main sidebar: to access them, click on your profile, at the bottom left of the screen.
A dedicated page opens, with its own sub-navigation on the left: My Profile, Business Configuration, Account, Subscription, Your Team, Report Template, Notifications, Language, Privacy, About. The Sign Out button is at the bottom of this sub-navigation.
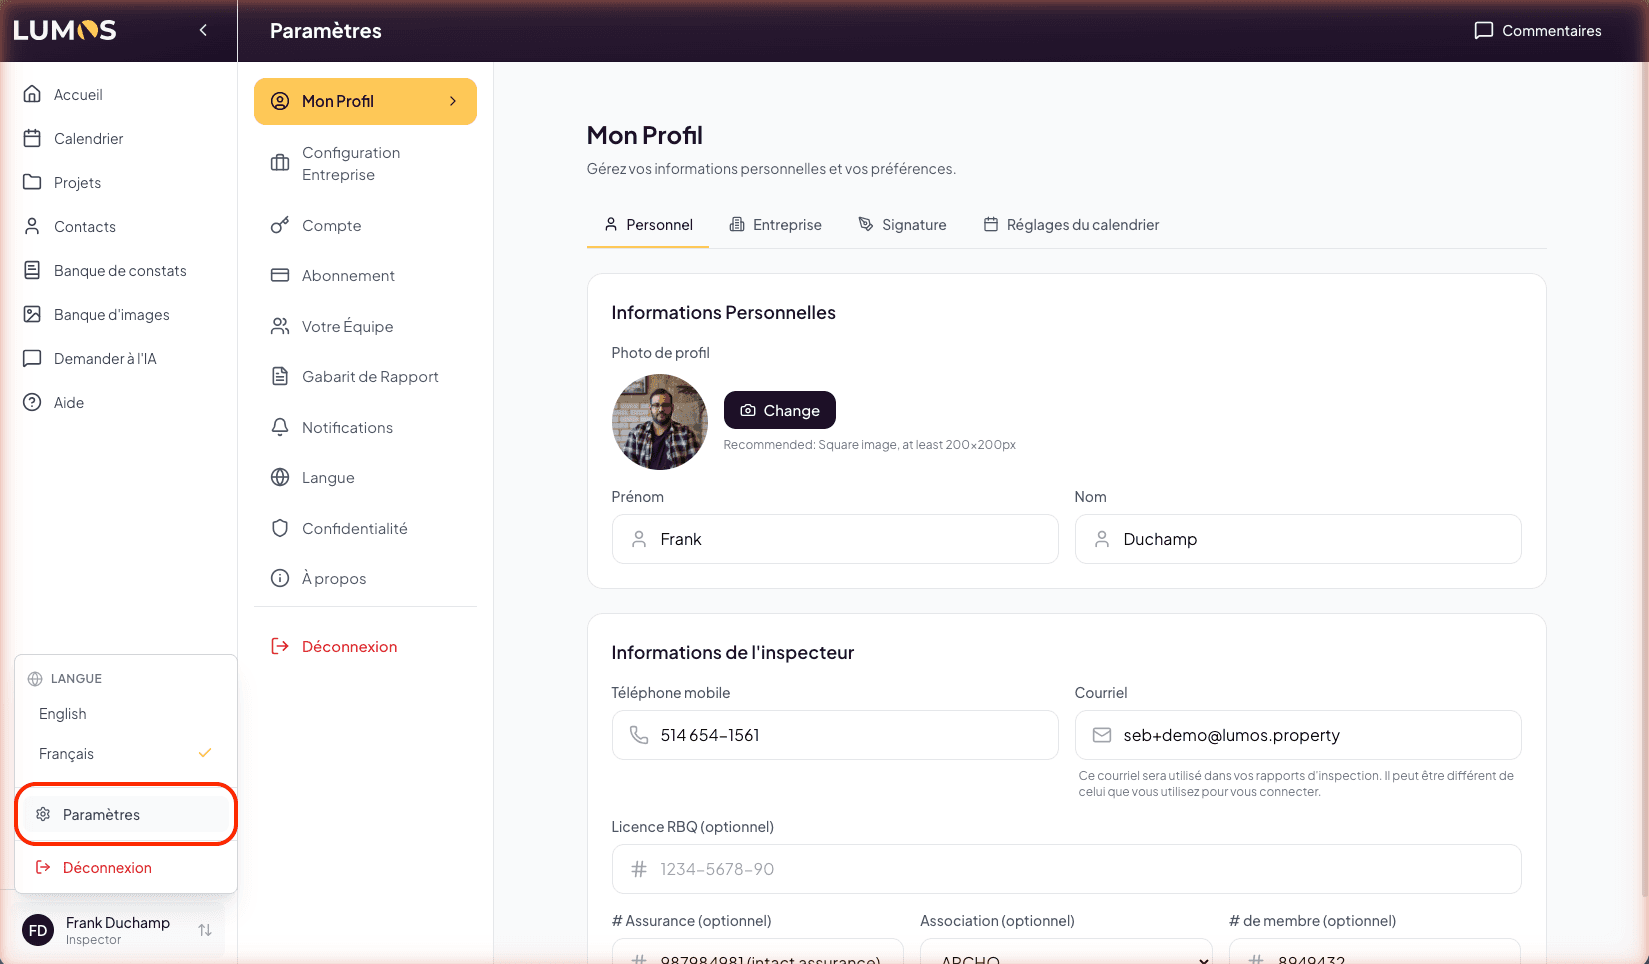
To return to your work, click any entry in the main sidebar (to the left of the Settings panel).
The sidebar and header structure is identical on Lumos Web (desktop) and Lumos Web Mobile (browser on a phone). On mobile, the sidebar collapses automatically and opens via a menu icon at the top left. For field capture, the Lumos Capture app offers a different interface, optimized for mobility. See Web, Web Mobile, and Lumos Capture: what to do where.
See also
- The dashboard — understanding the information shown on Home
- Web, Web Mobile, and Lumos Capture: what to do where — choosing the right surface for each task
- Setting up your account and profile — preparing Lumos before your first inspection